Name a File Before Scanning on Sharp Scanner
We are often asked how to name a file before scanning it to an email or shared network folder. This is a simple procedure on your Sharp, done entirely from the touch screen. The file name doesn’t have to be a date and time stamp if you don’t want it to be!
Follow along with this video or with the step-by-step instructions with pictures below.
Youtube Video: How to name a file before scanning on a Sharp scanner
Step-by-Step instructions on how to name a file before scanning on a Sharp scanner
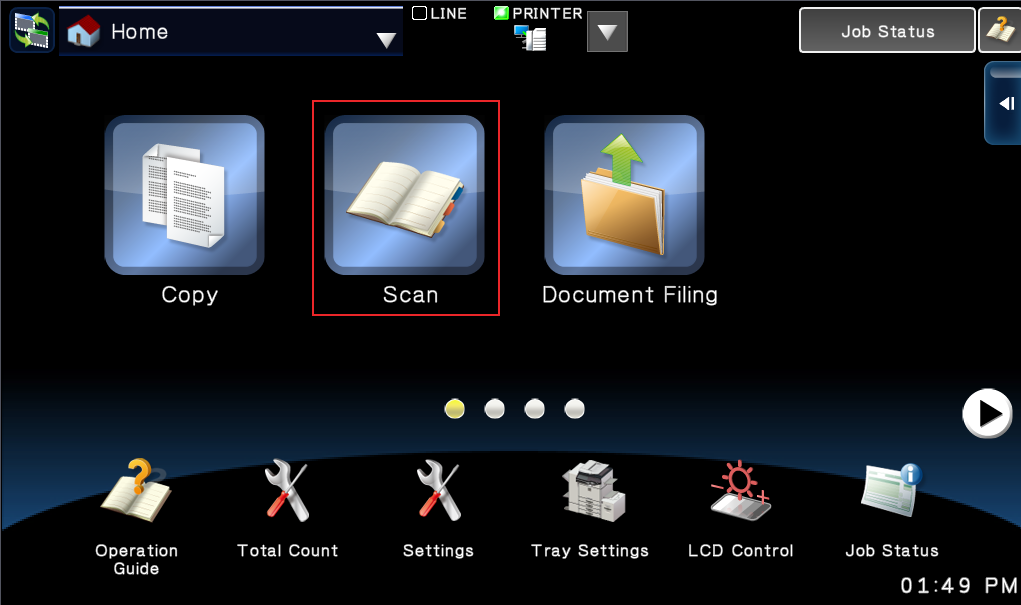
- Touch Scan or whichever button gets you to your scanning address book
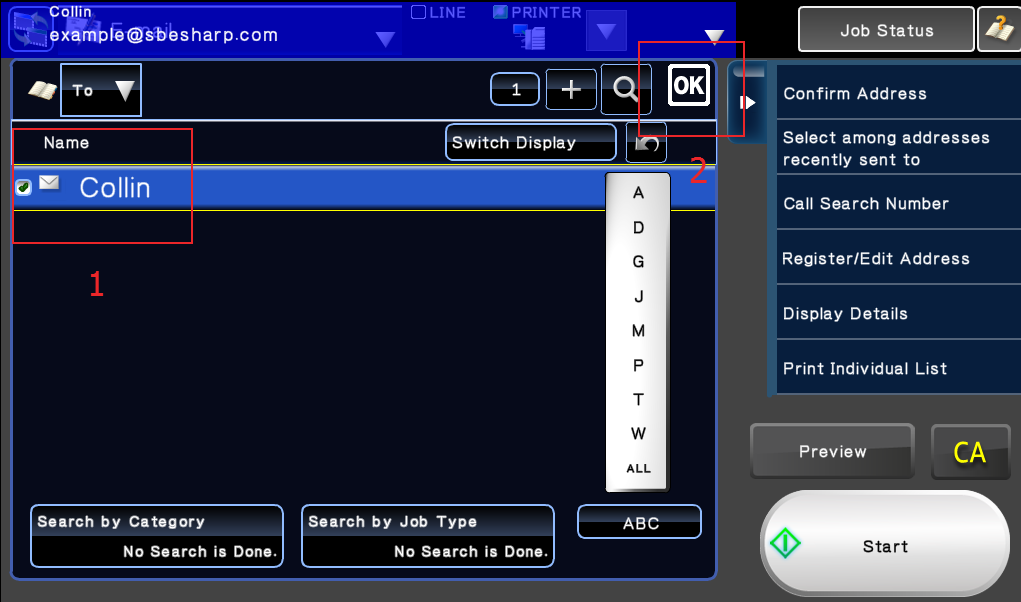
- Touch your name or scan destination, then touch OK
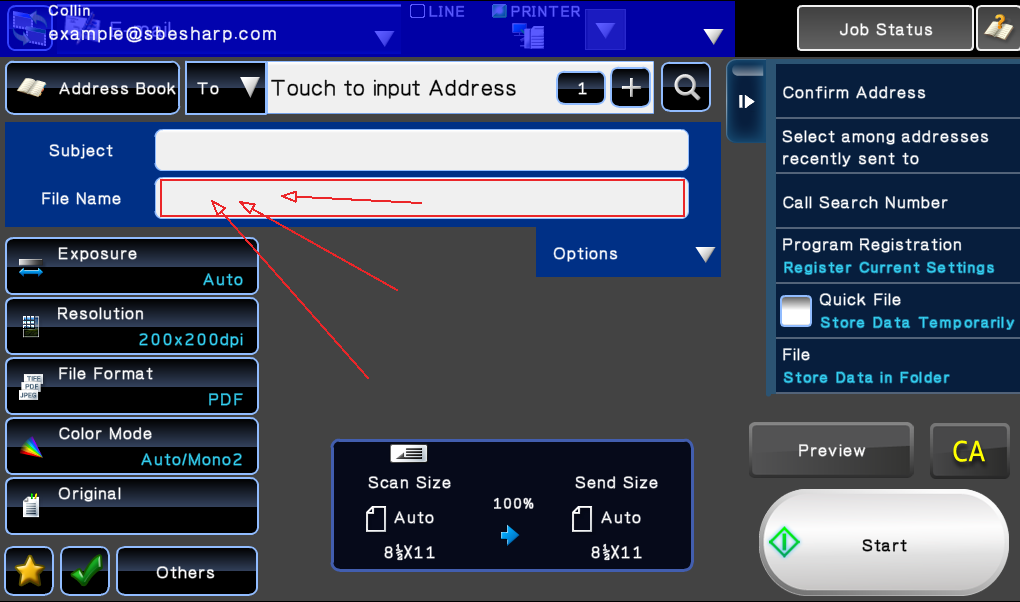
- Touch the empty box next to File Name near the top of the touch screen
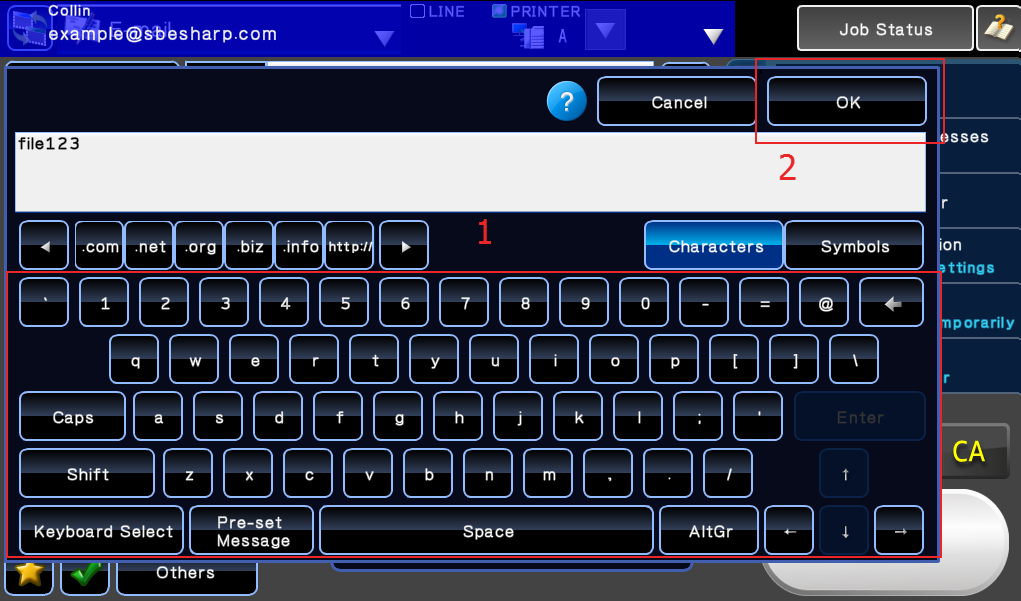
- Touch Direct Entry to bring up the keyboard interface
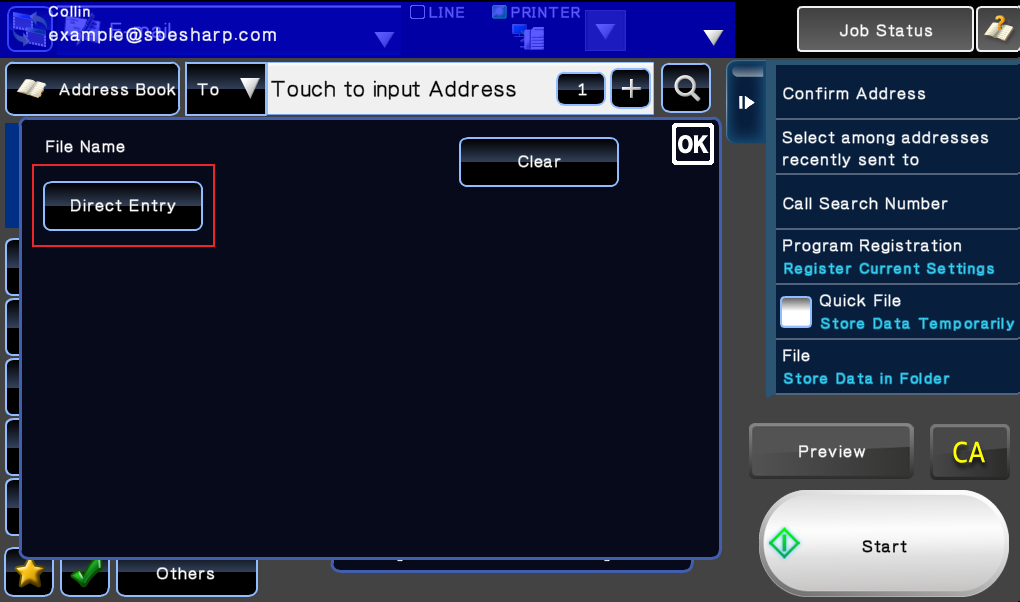
- Enter the file name you’d like, then touch OK
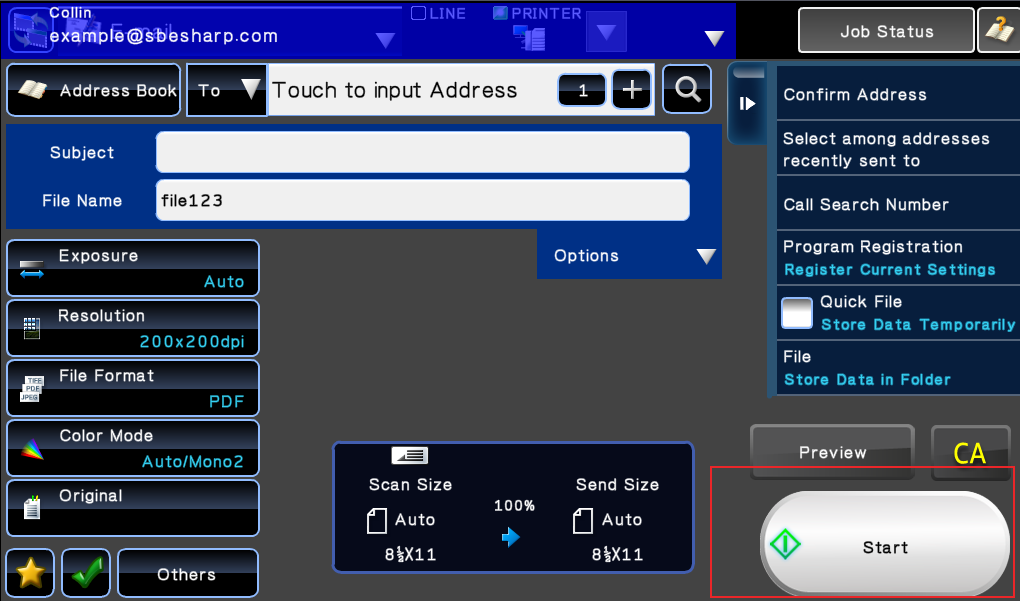
- Touch Start to begin scanning your document
Now that you know how to name a file before scanning it on your sharp scanner, take a look at our How To library for other great tips and tricks. Use the search feature in the navigation bar, or on the Blog page.
If you’re searching for a copier dealer in Houston with new and refurbished copiers, look no further than Skelton Business Equipment! We are the premier Sharp dealer in Houston and have the best service call turnaround time in town – less than 4 hours. Experience our excellent service for yourself, request a quote today!

My screen looks a little different than the one pictured. I’m working on procedures and instructions for our Summer Interns.
I have access to the copier from my desktop. Would it be possible to see the exact screen of our copier on my desktop so I can take a screenshot to include in the instructions?
You can use VNC viewer to view/control the copier’s display from your computer. Instructions for setting this up can be found at the following link. You’ll need to download VNC Viewer, it’s a free program.
https://siica.sharpusa.com/portals/0/downloads/Manuals/MX-M654N-M754N/contents/01-040.htm