SOLVED: Network Error. (Timeout Error) Consult your network administrator.
Gmail is disabling Less Secure Apps as of May 31, 2022. This procedure is for setting up a new Gmail account from scratch, enabling 2-factor authentication, creating a Gmail App Password, and setting up scanning to email on your Sharp multi-function device using these settings.
Disclaimer:
Platinum Copier Solutions created this How To for users to resolve this Gmail issue themselves free of charge. If we need to help remotely the cost is $35 for 15 minutes or fewer. If we need to visit your physical location it will cost $125 for an hour of labor.
Follow along with this How To video, or go step-by-step with the instructions below
Begin this procedure from the touch panel of your Sharp device.
1. Touch the Settings button on your Home screen
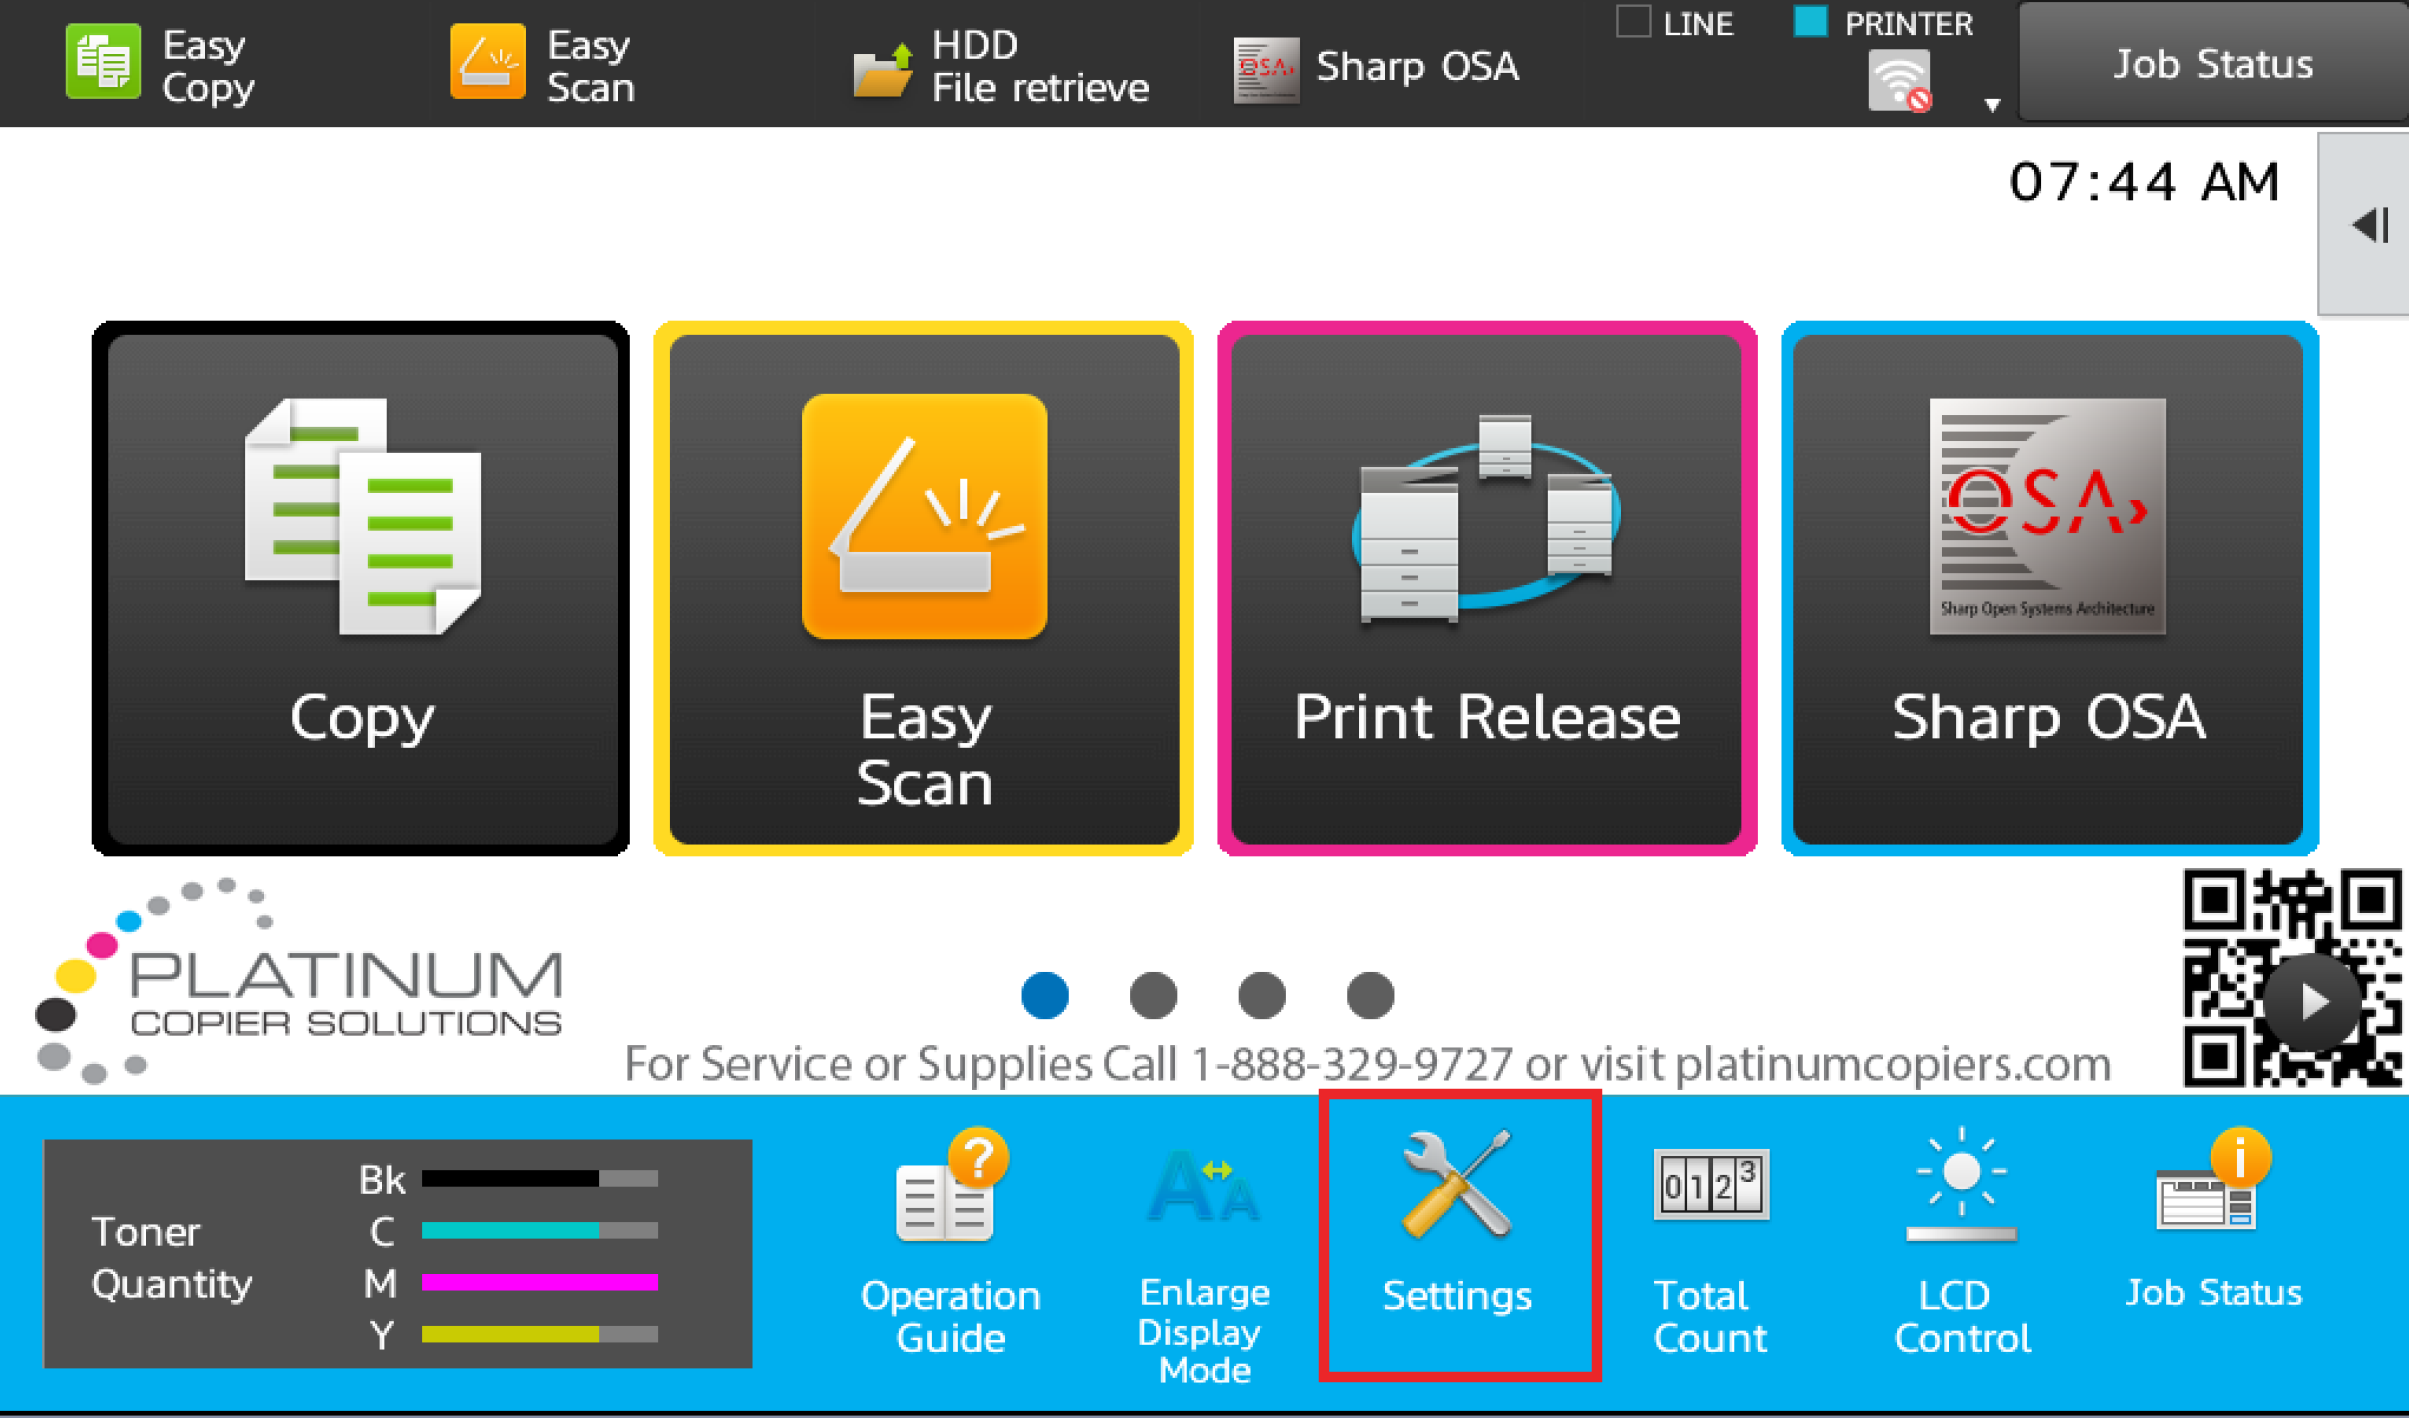
2. Touch the Status tab, touch Network status, scroll down on the right to view and make note of the machine’s IPv4 address. 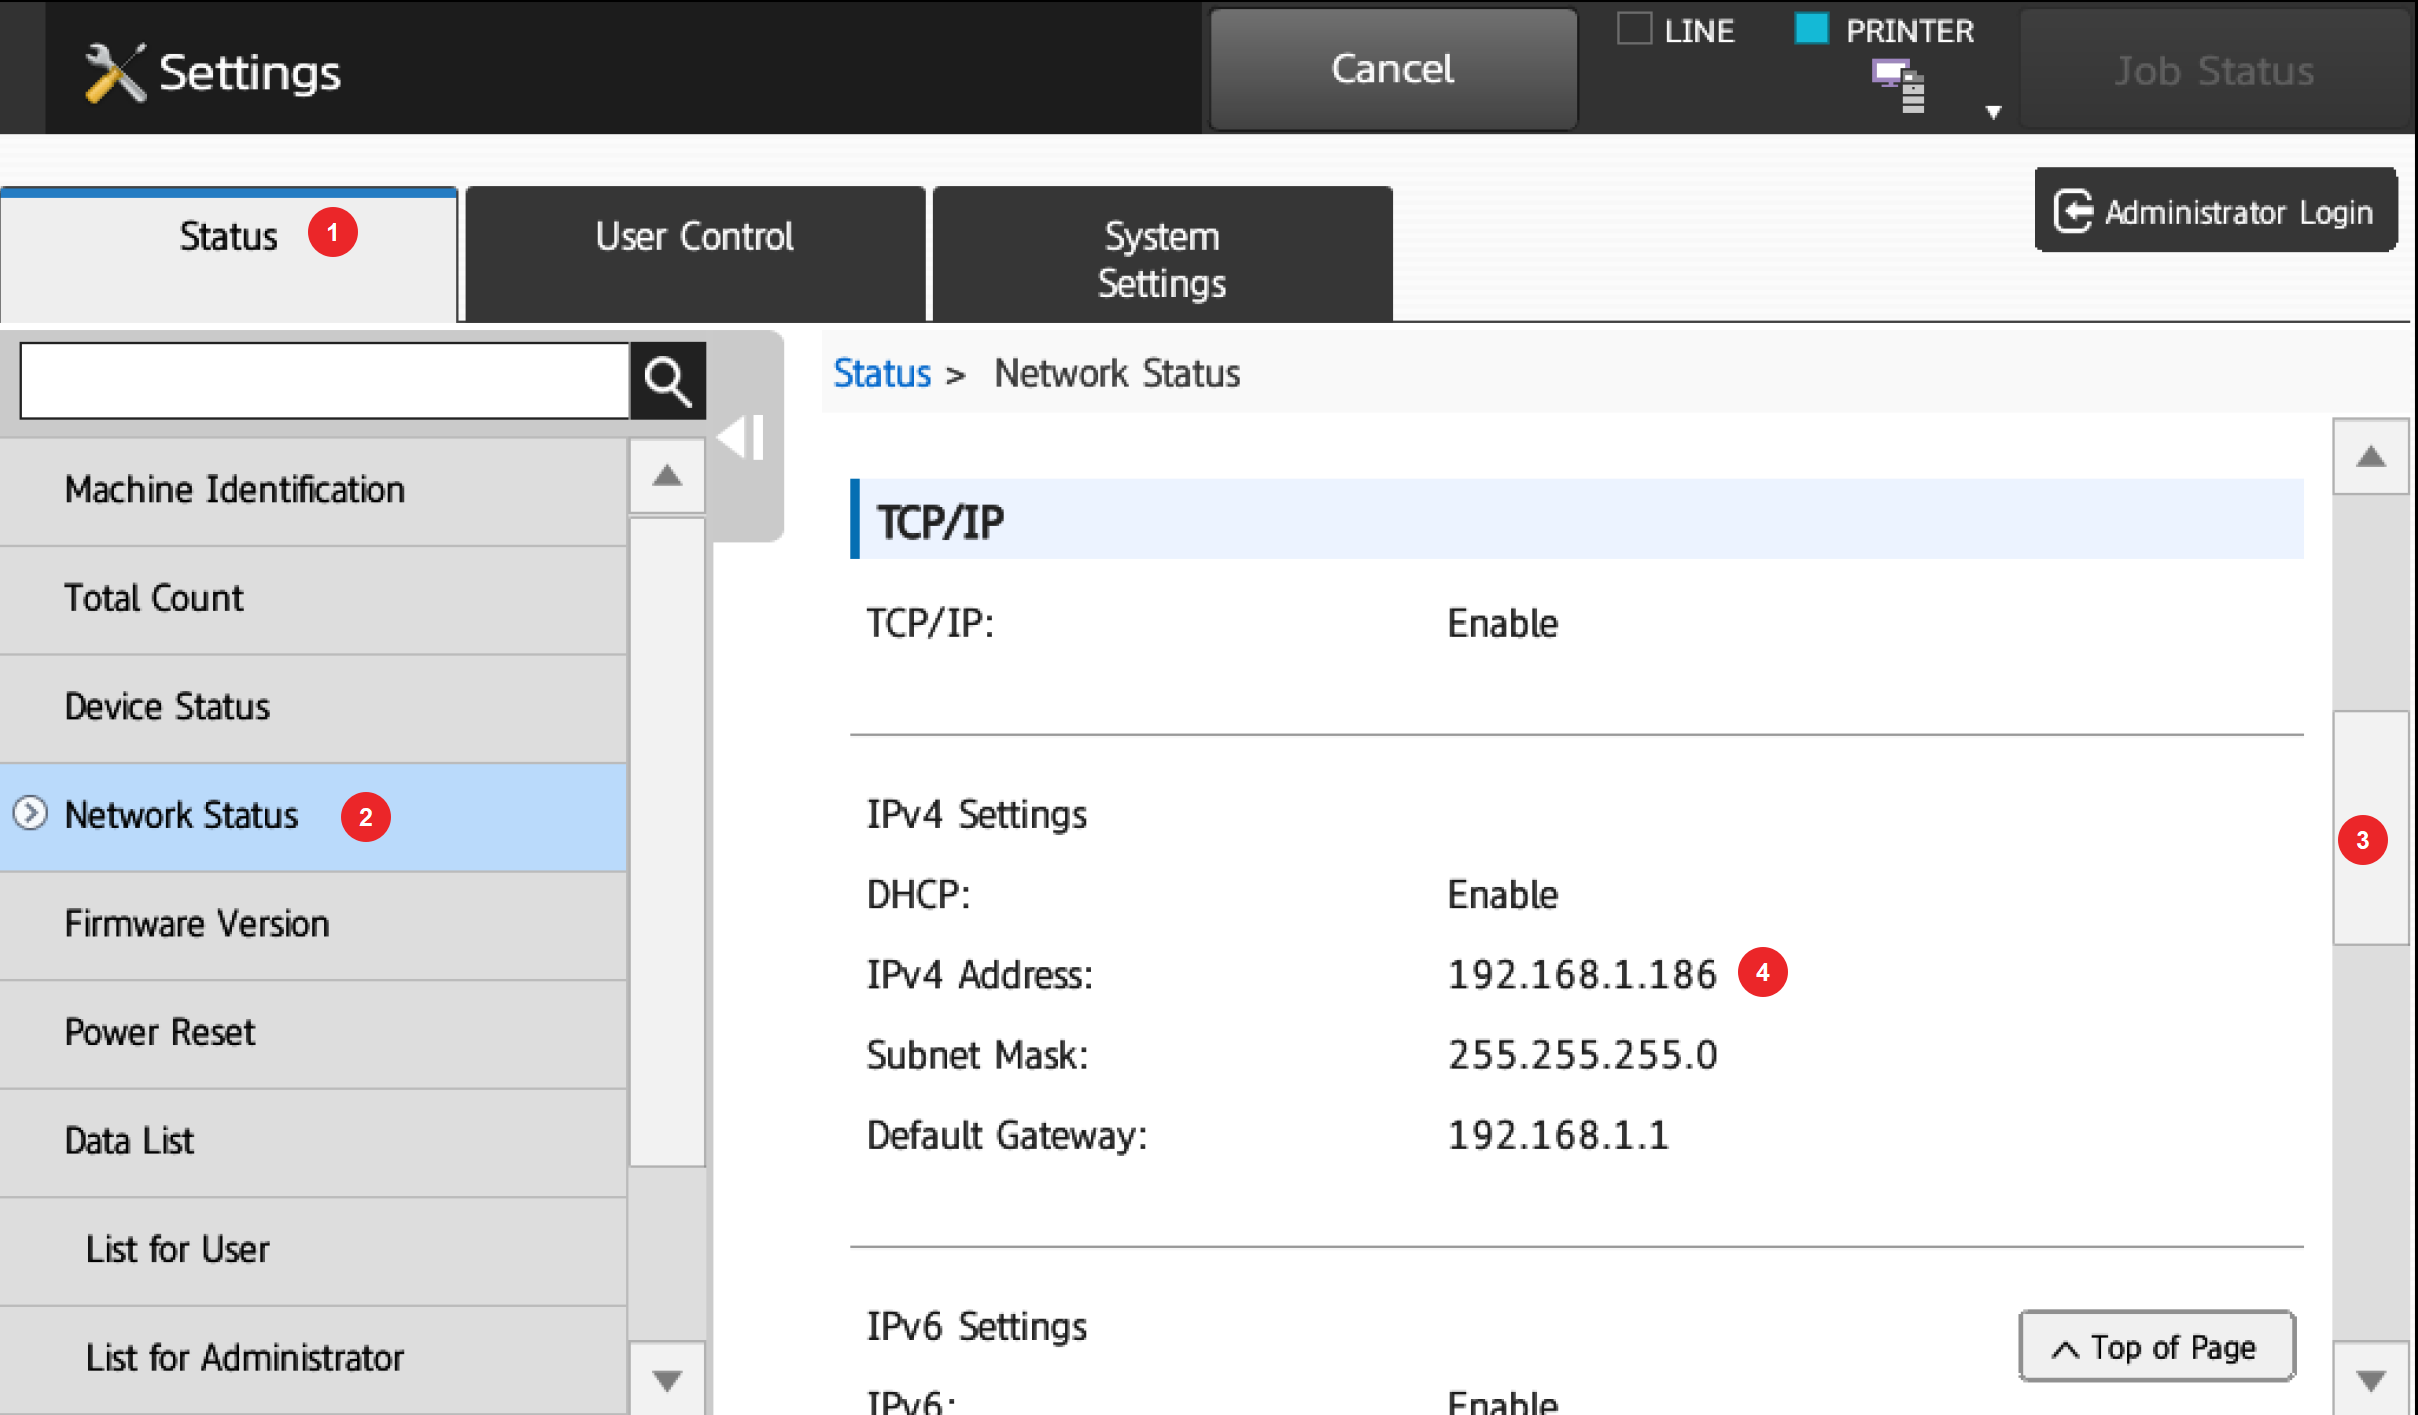
3. At your computer, open a web browser and search Google for Create a Gmail Account and click the link as shown below. 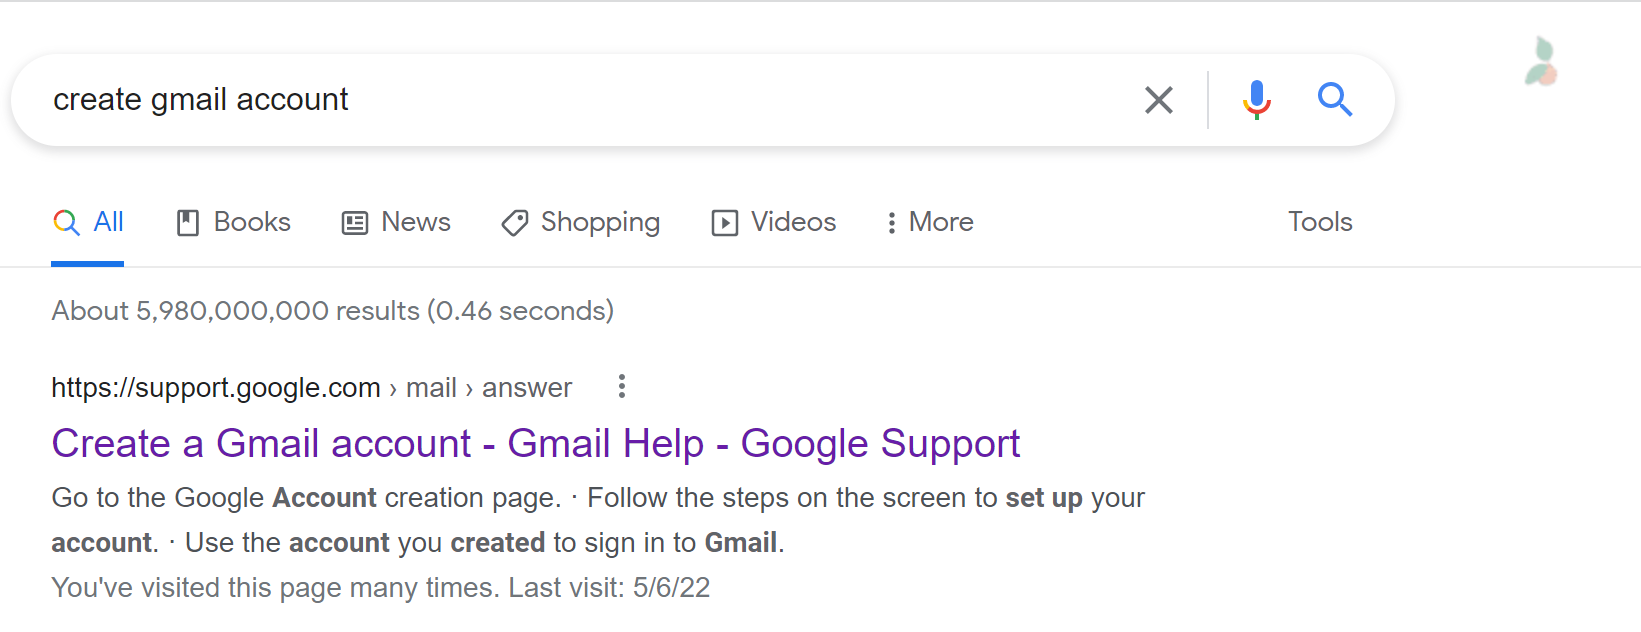 4. Click Create an Account
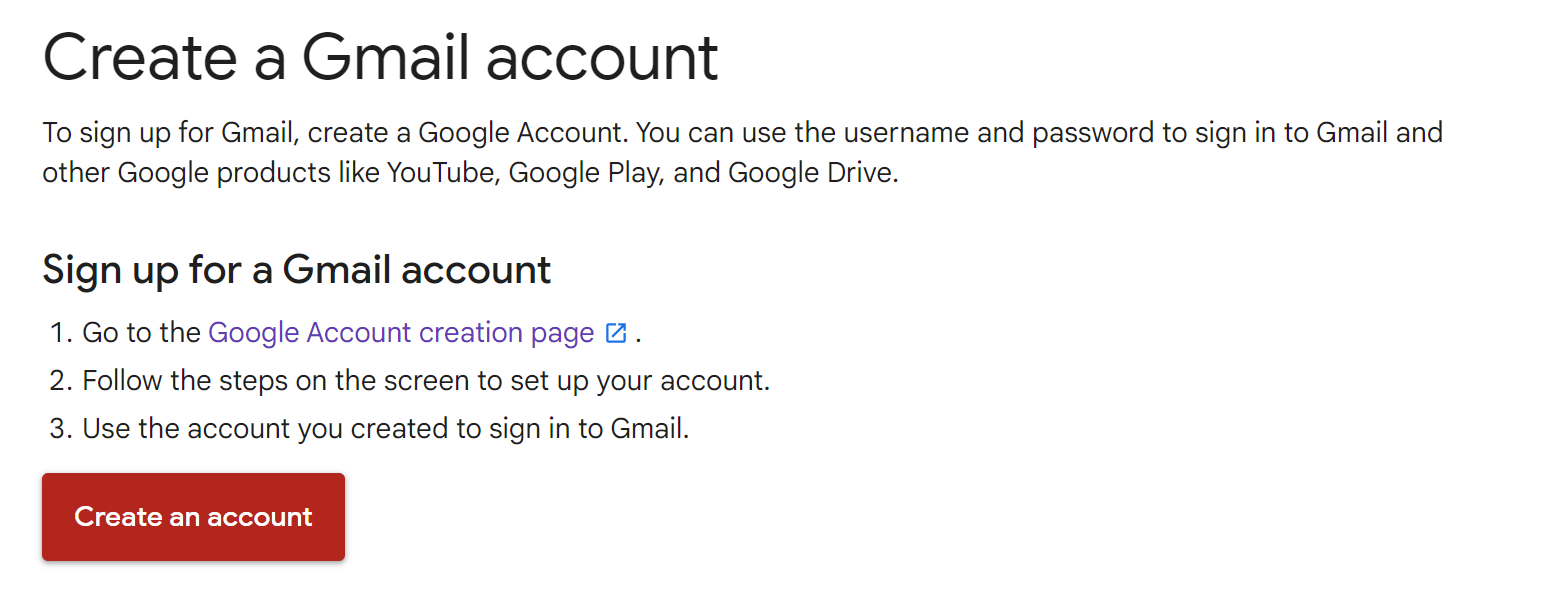
5. Fill in the Account details with a username and password of your choosing. This account is strictly for scanning purposes and does not need to be tied to any person in general. The username here will be utilized later, make sure to make note of it. Click Next. 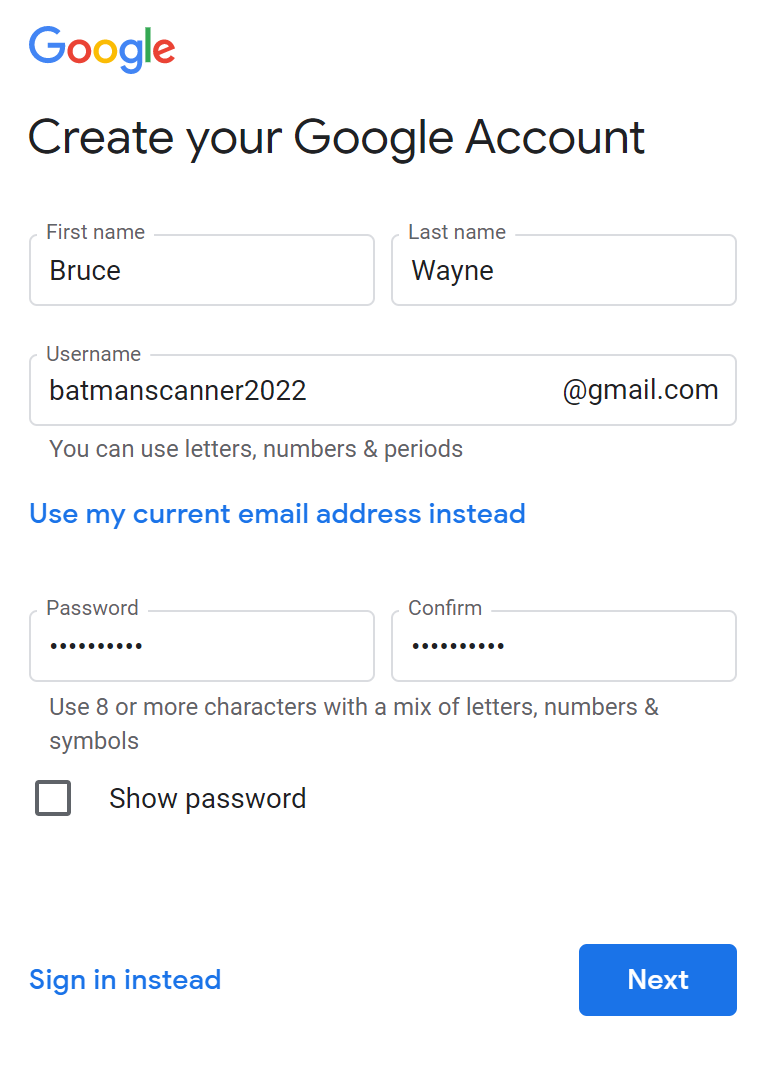
6. Enter a birthdate and a gender then click Next. After clicking next, on the following page scroll down and agree to the terms. 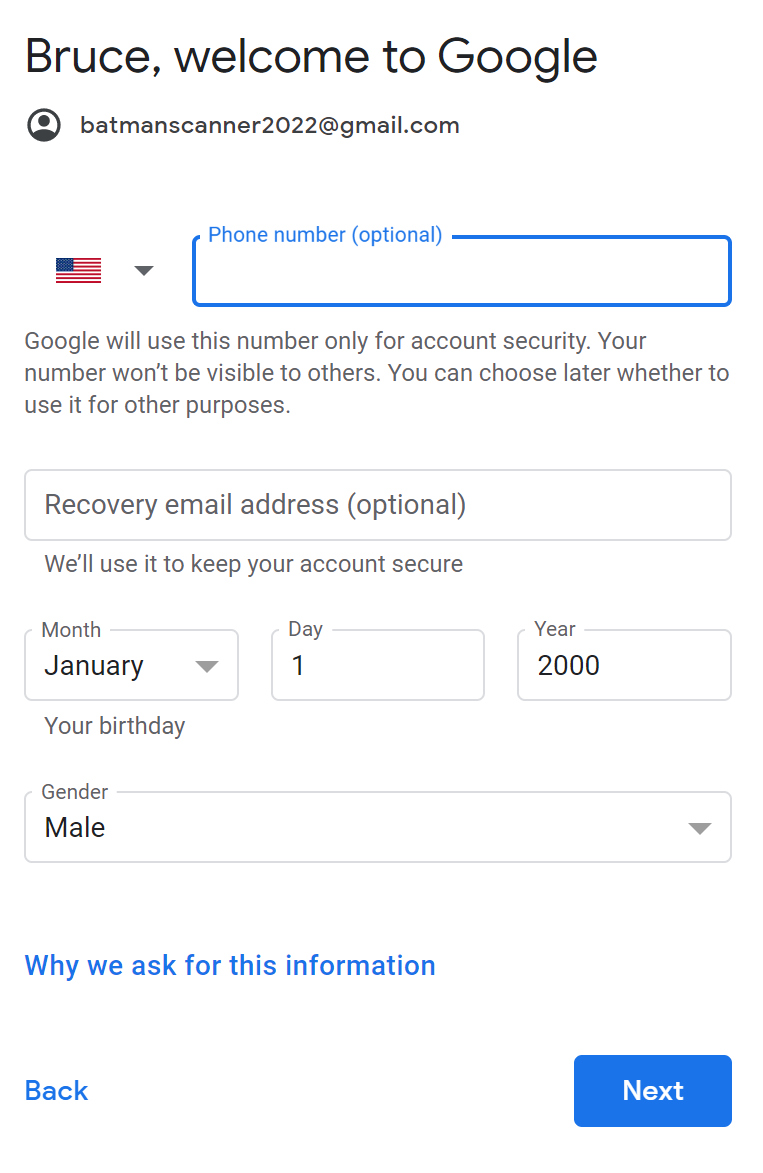
7. On your new account’s home screen, click Count Me In to begin the 2-Factor Authentication activation. 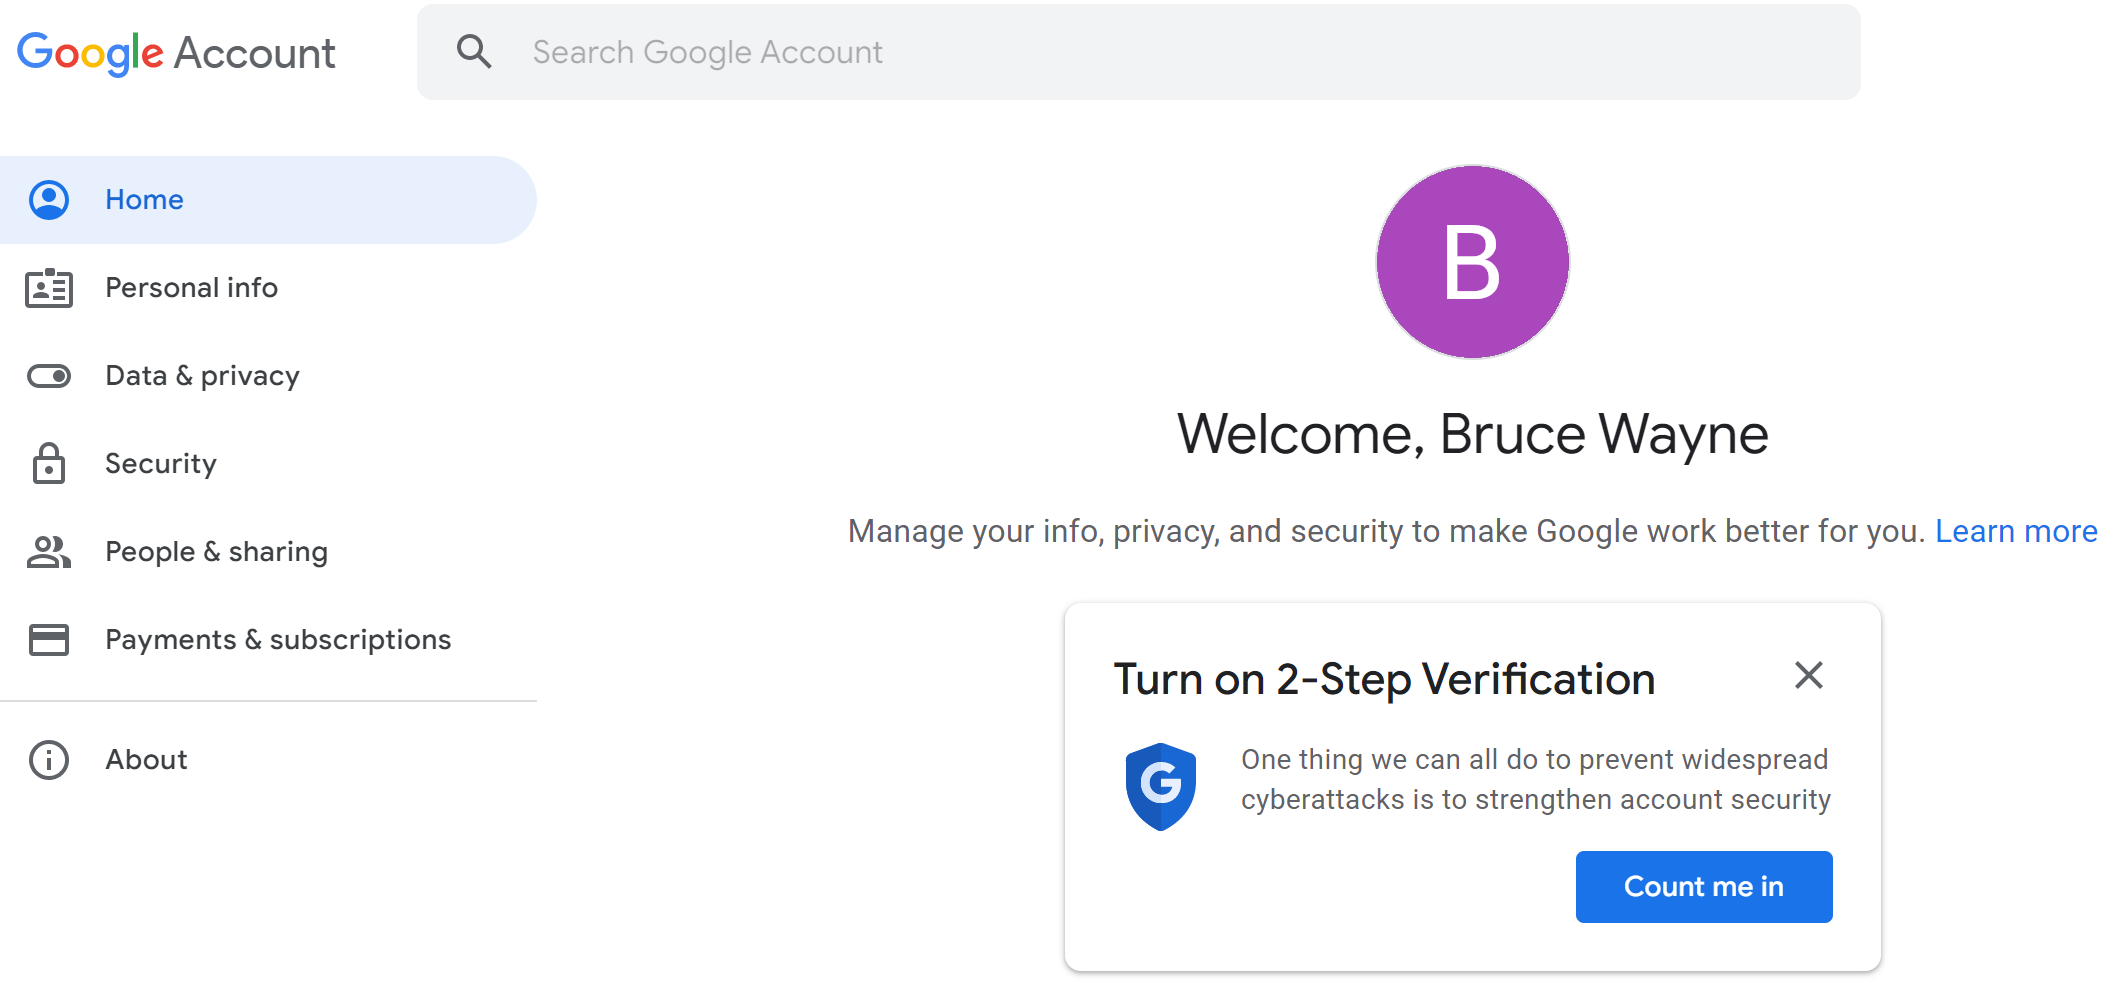
8. Click Get Started 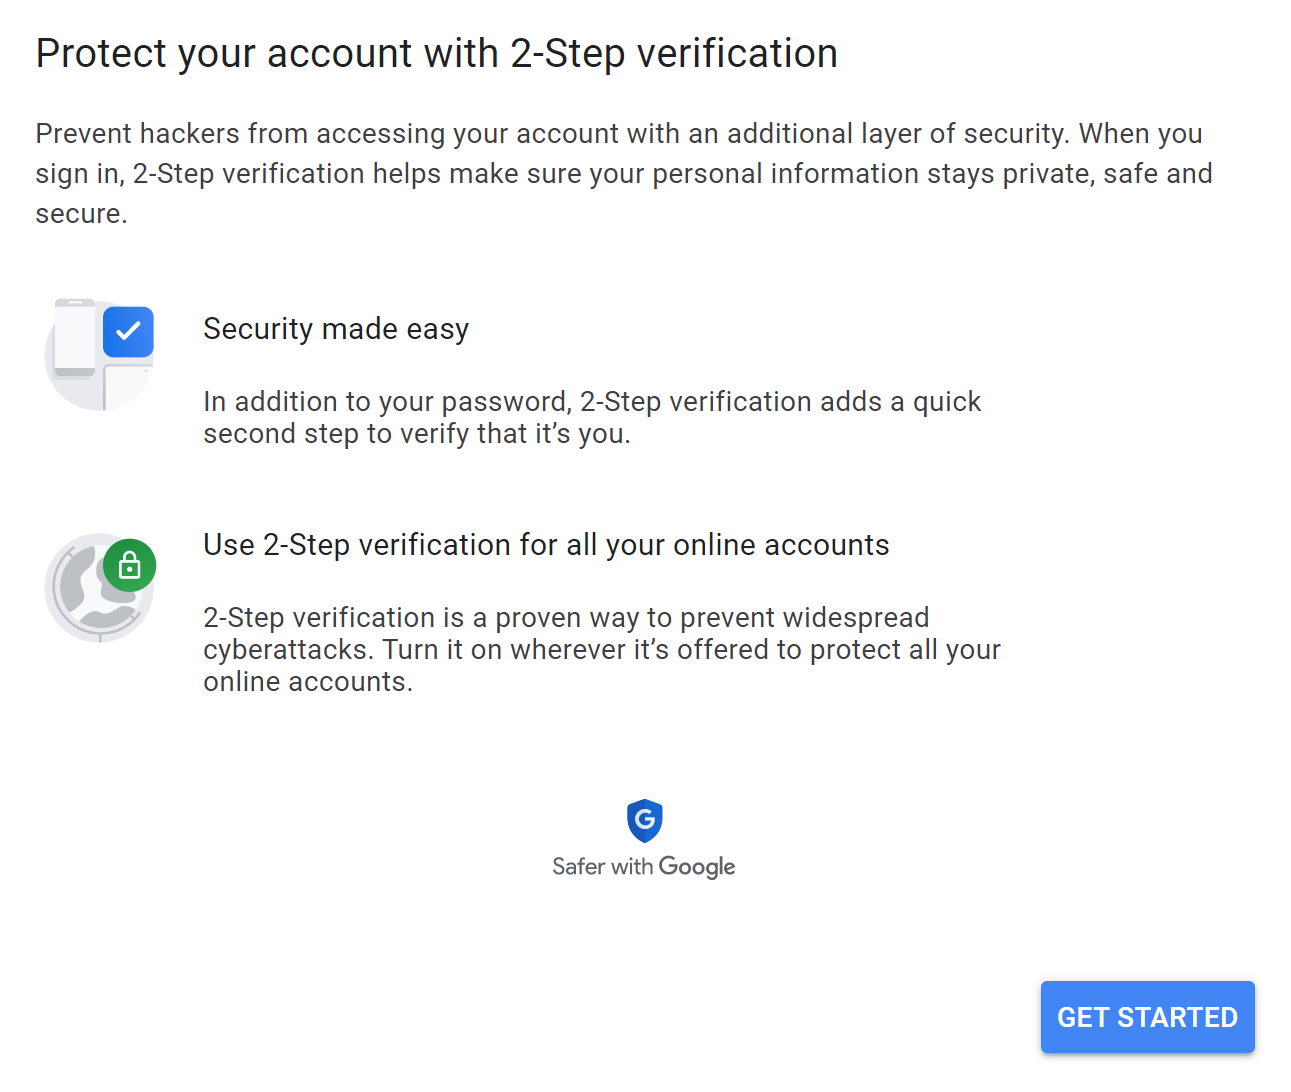
9. Enter the password you chose in step 5 to verify your identity, then click Next. 
10. Enter a mobile phone number to use for 2-Factor Authentication, leave the radio button on Text Message and click Next. 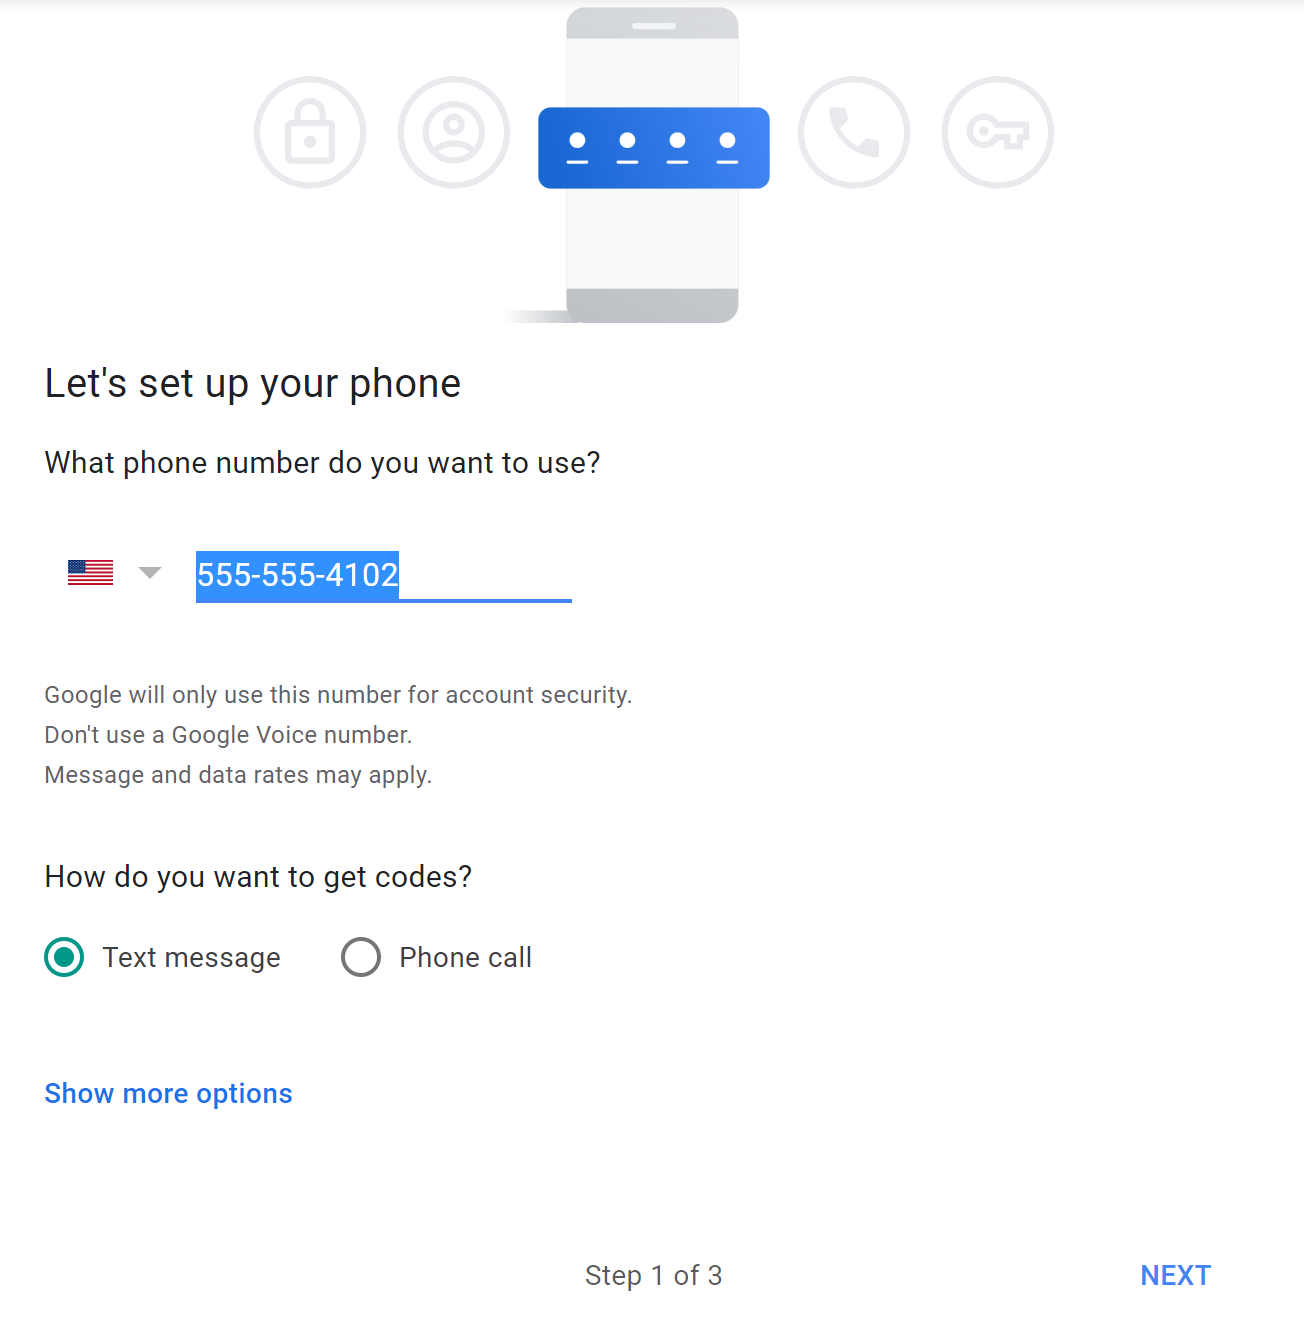
11. Check the phone of the number you provided for a text message from Google, then enter the 6-digit verification code on the page from the previous step. 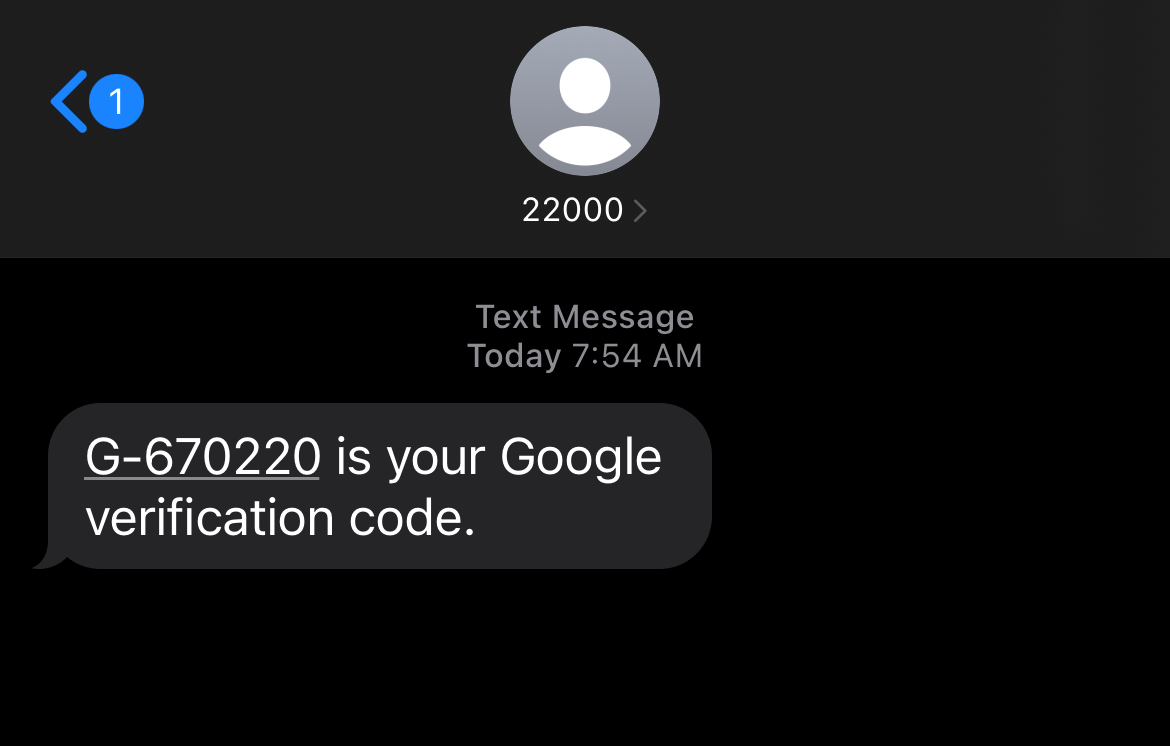
12. Click Turn On 
13. Click on the circular letter icon in the top-right corner, then click Manage your Google Account. 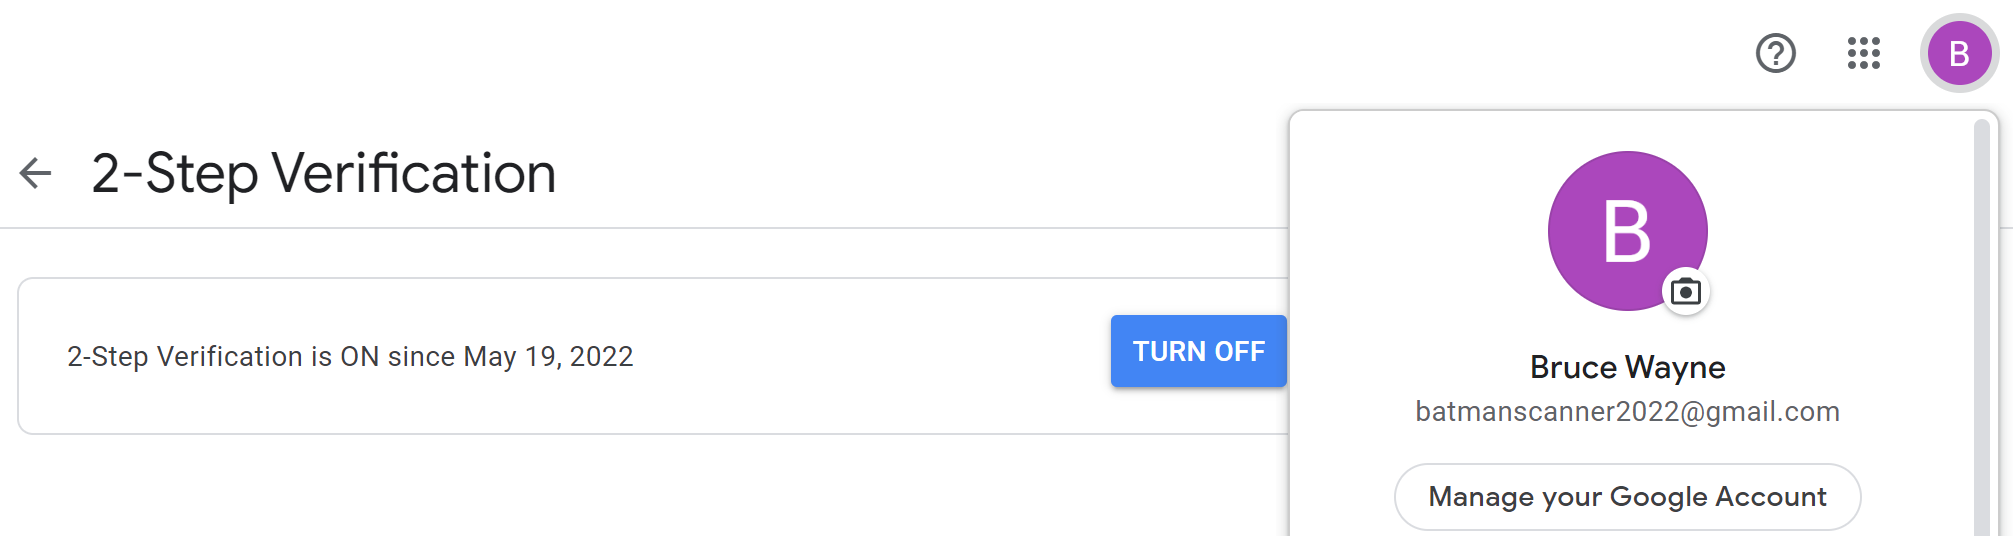
14. Click the Security tab on the left menu, then click the “>” on the right side of the App passwords area. 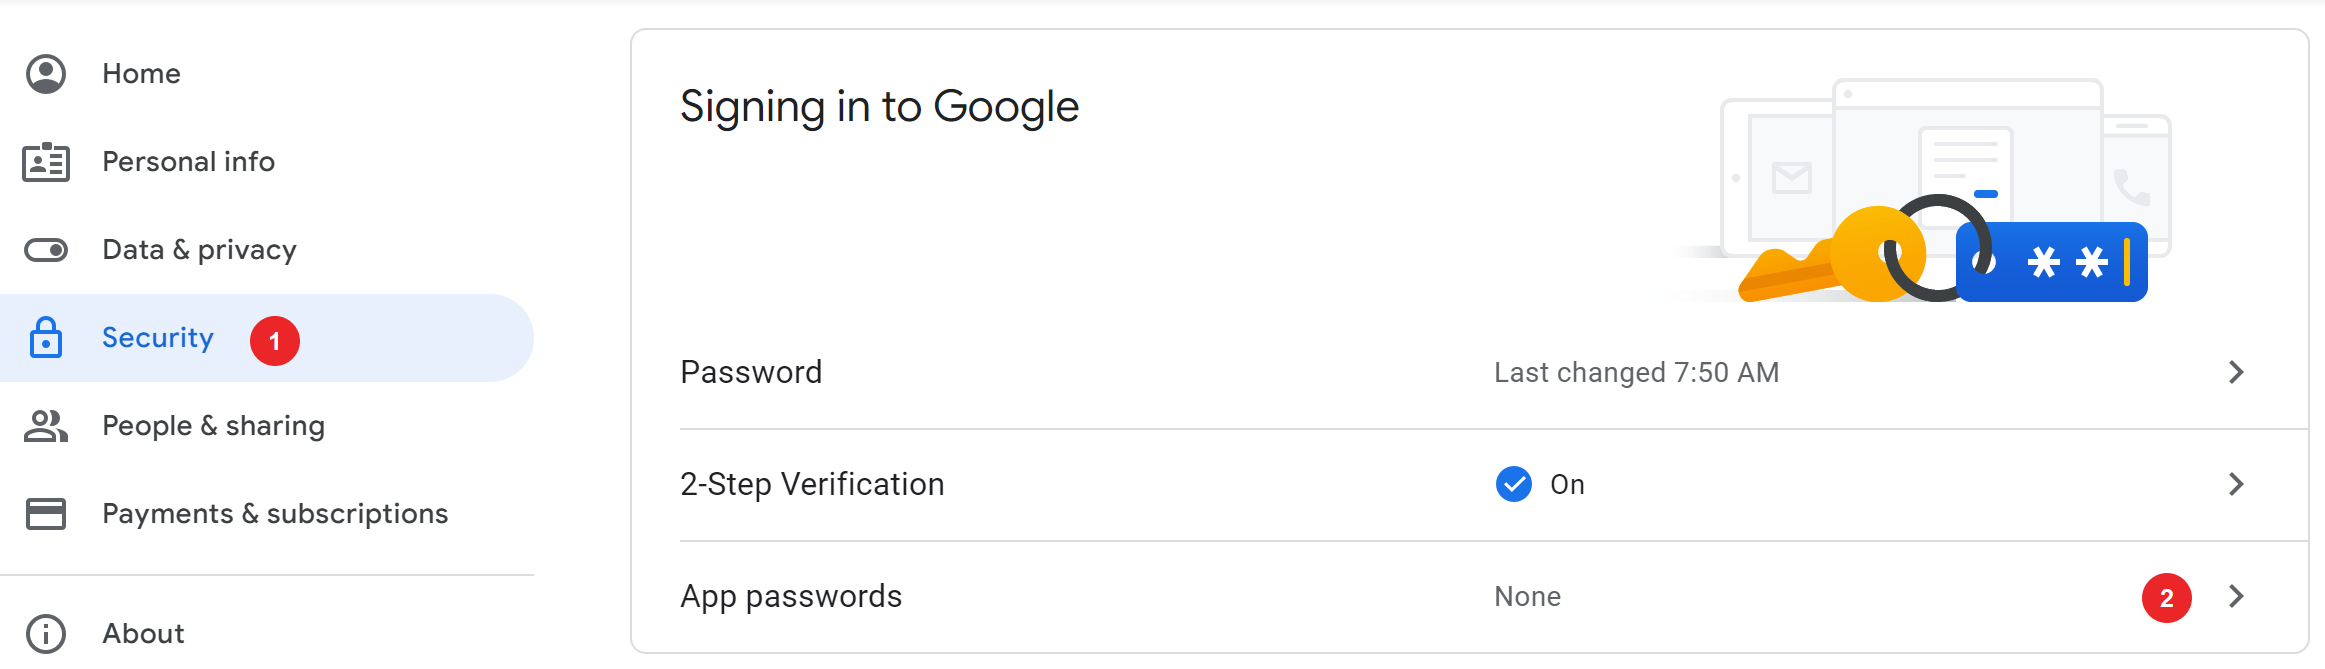
15. Re-enter the password you chose in step 5 to verify your identity, then click Next. 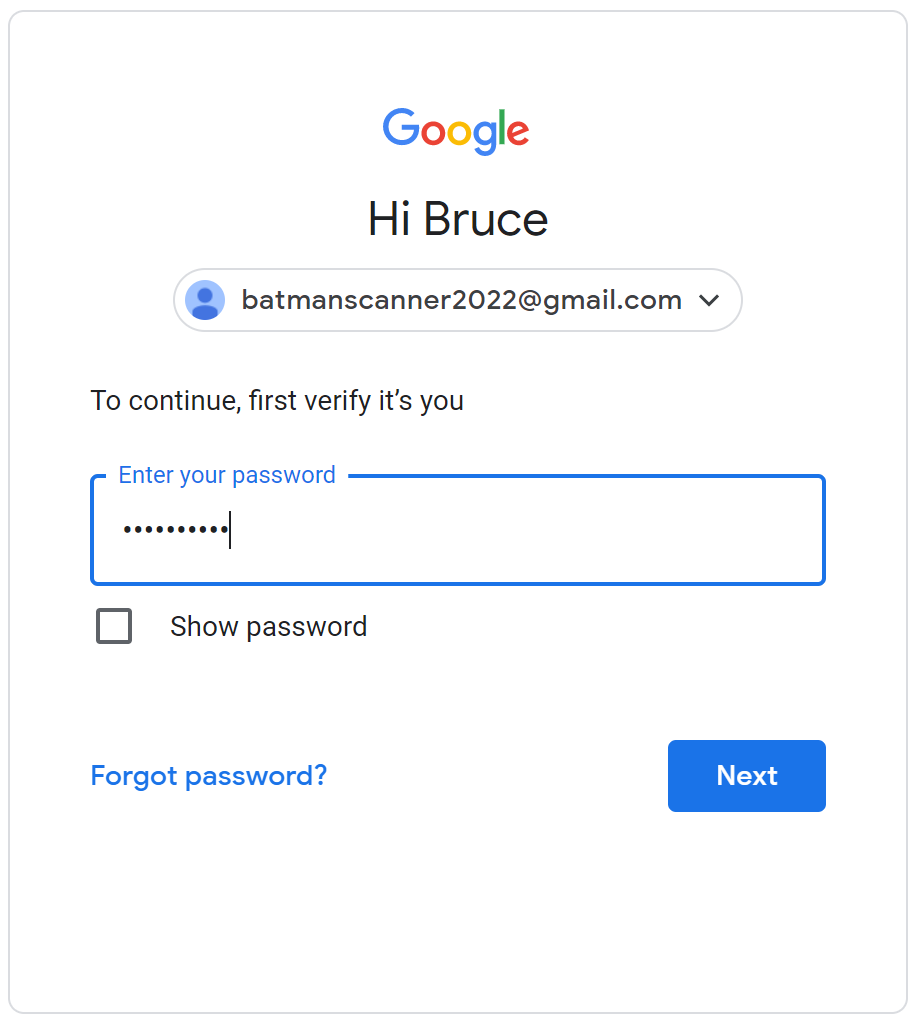
16. From the Select App drop-down menu, choose Other. 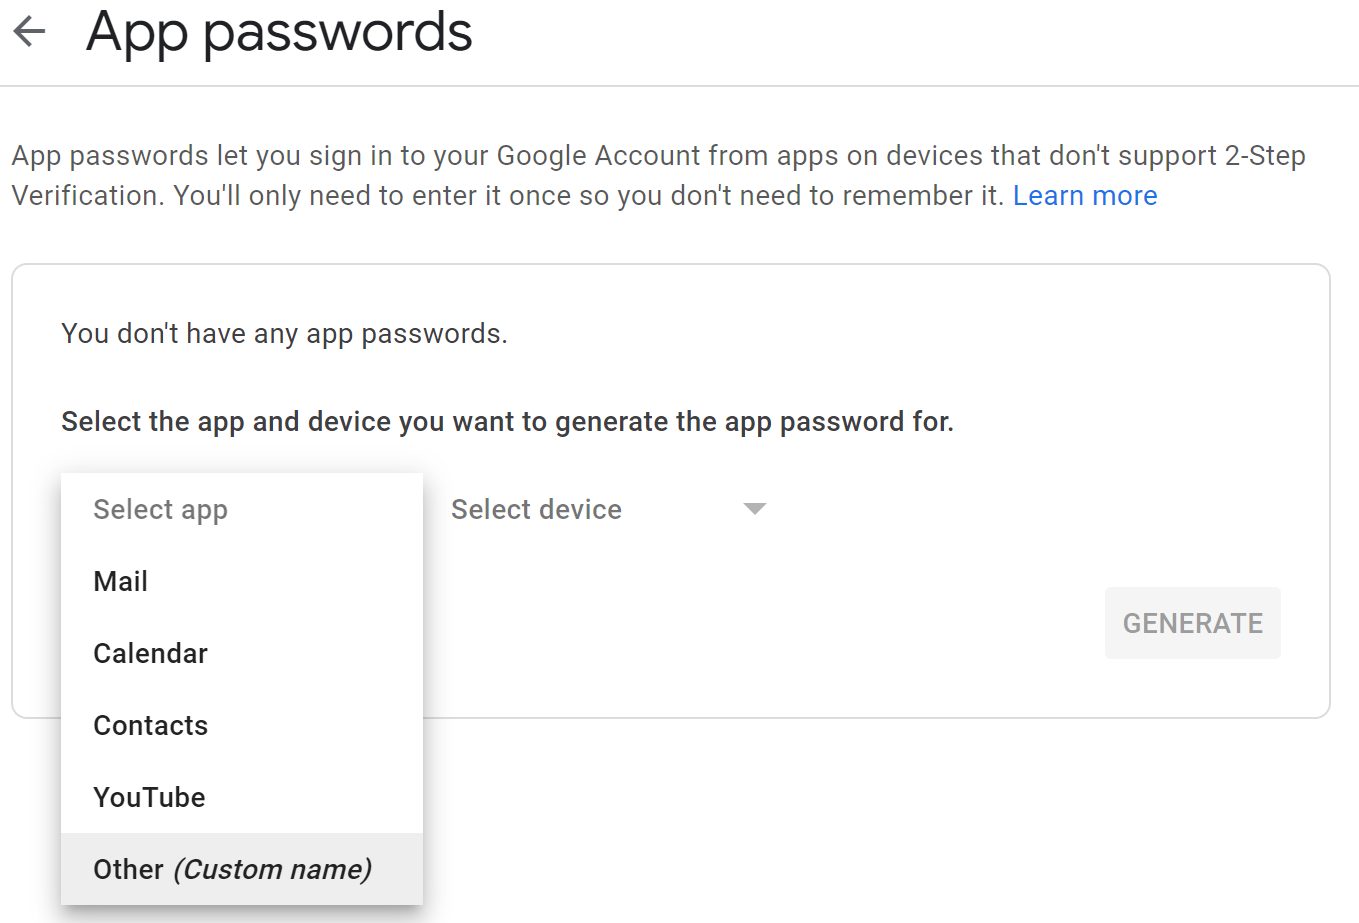
17. Enter Scanner for the app name, then click Generate. 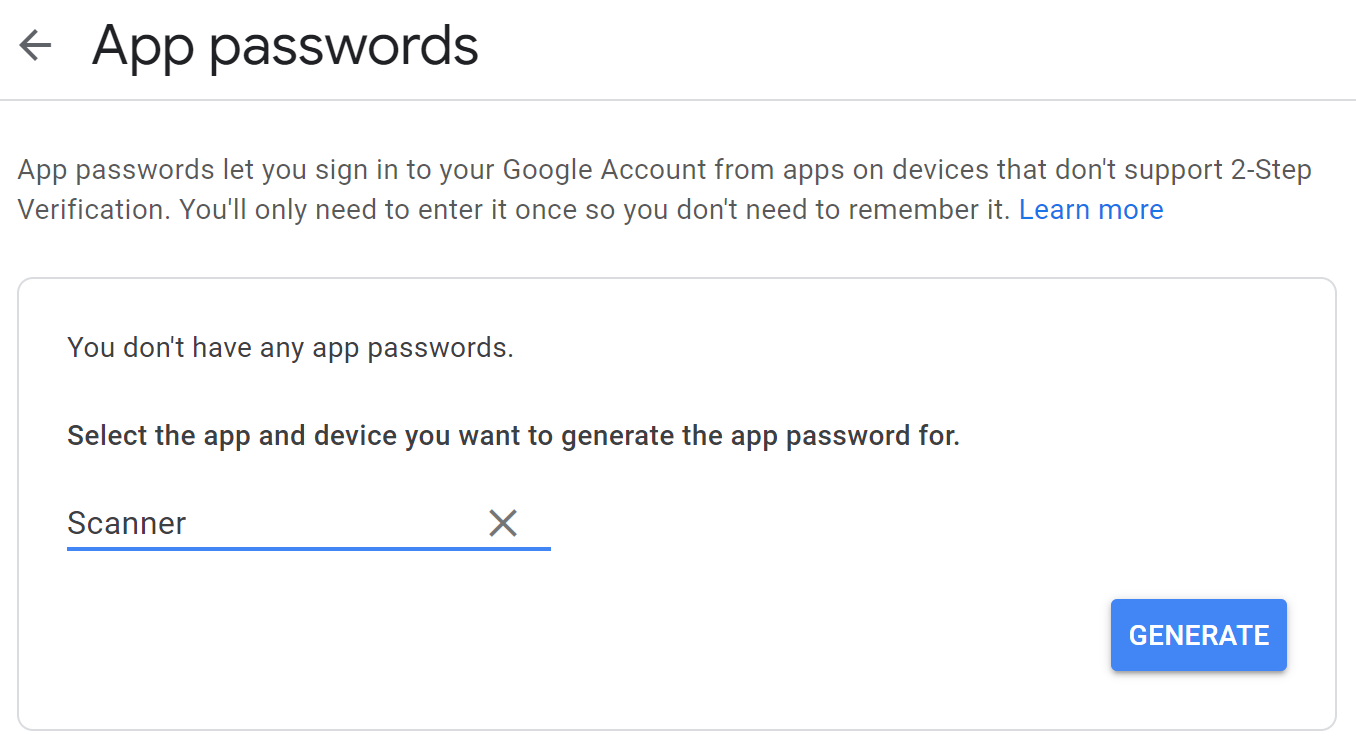
18. IMPORTANT: Highlight and copy the app password. This is a unique password that is generated one time, and once you leave this screen it cannot be recovered. Once copied (and you may want to make a physical note of it as well) click Done. 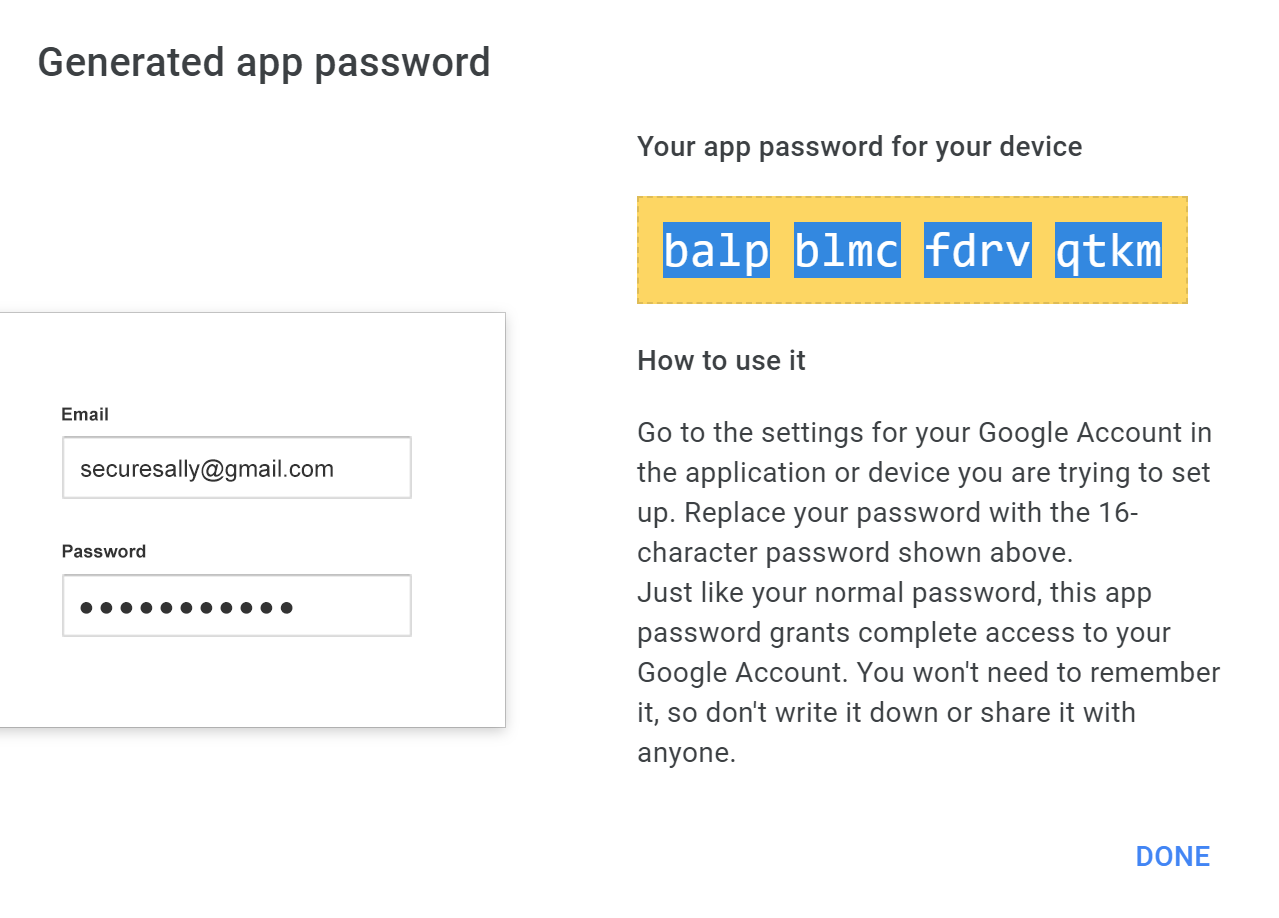
19. Open a new tab in your web browser. Type in the IPv4 address you gathered in step 2 (only the numbers and periods) to open the Sharp device web interface. Then click the Login button in the top-right. 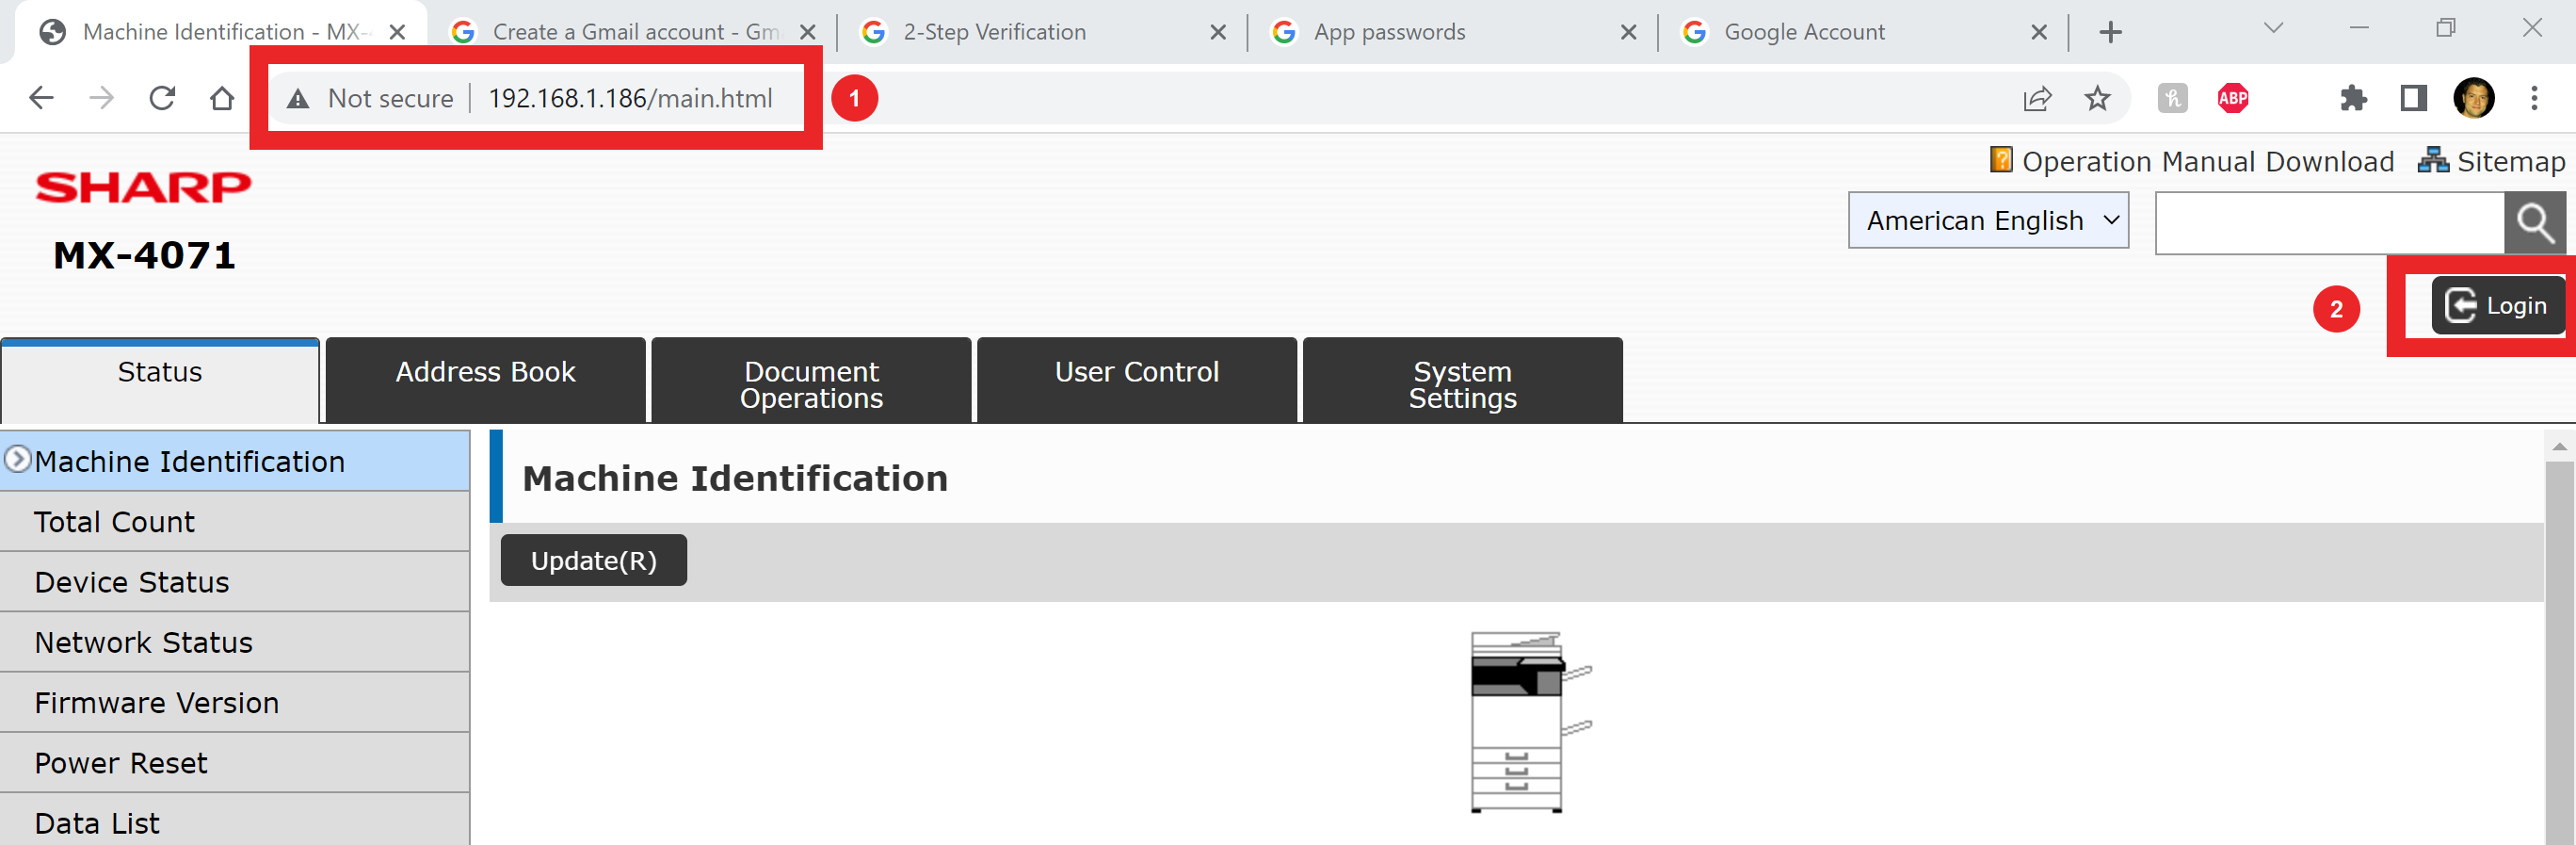
20. On the login screen, type the default administrator password of admin (if this password does not work it has been changed, consult your IT group) and click Login. 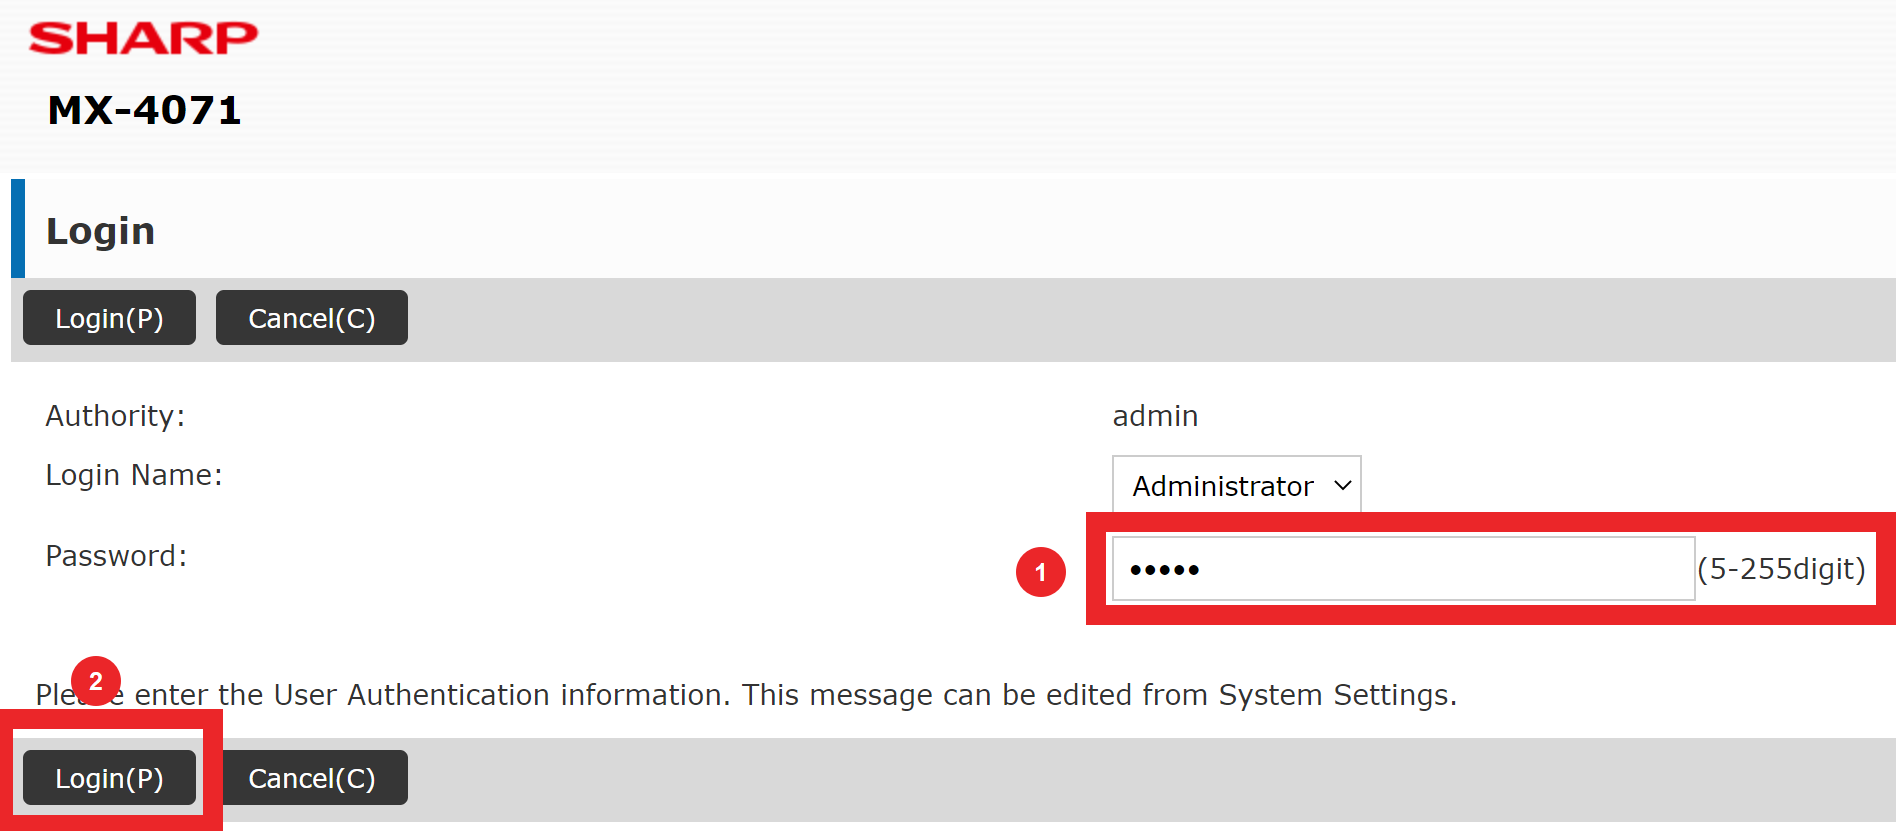
21. Click the System Settings tab, then click the Network Settings button. 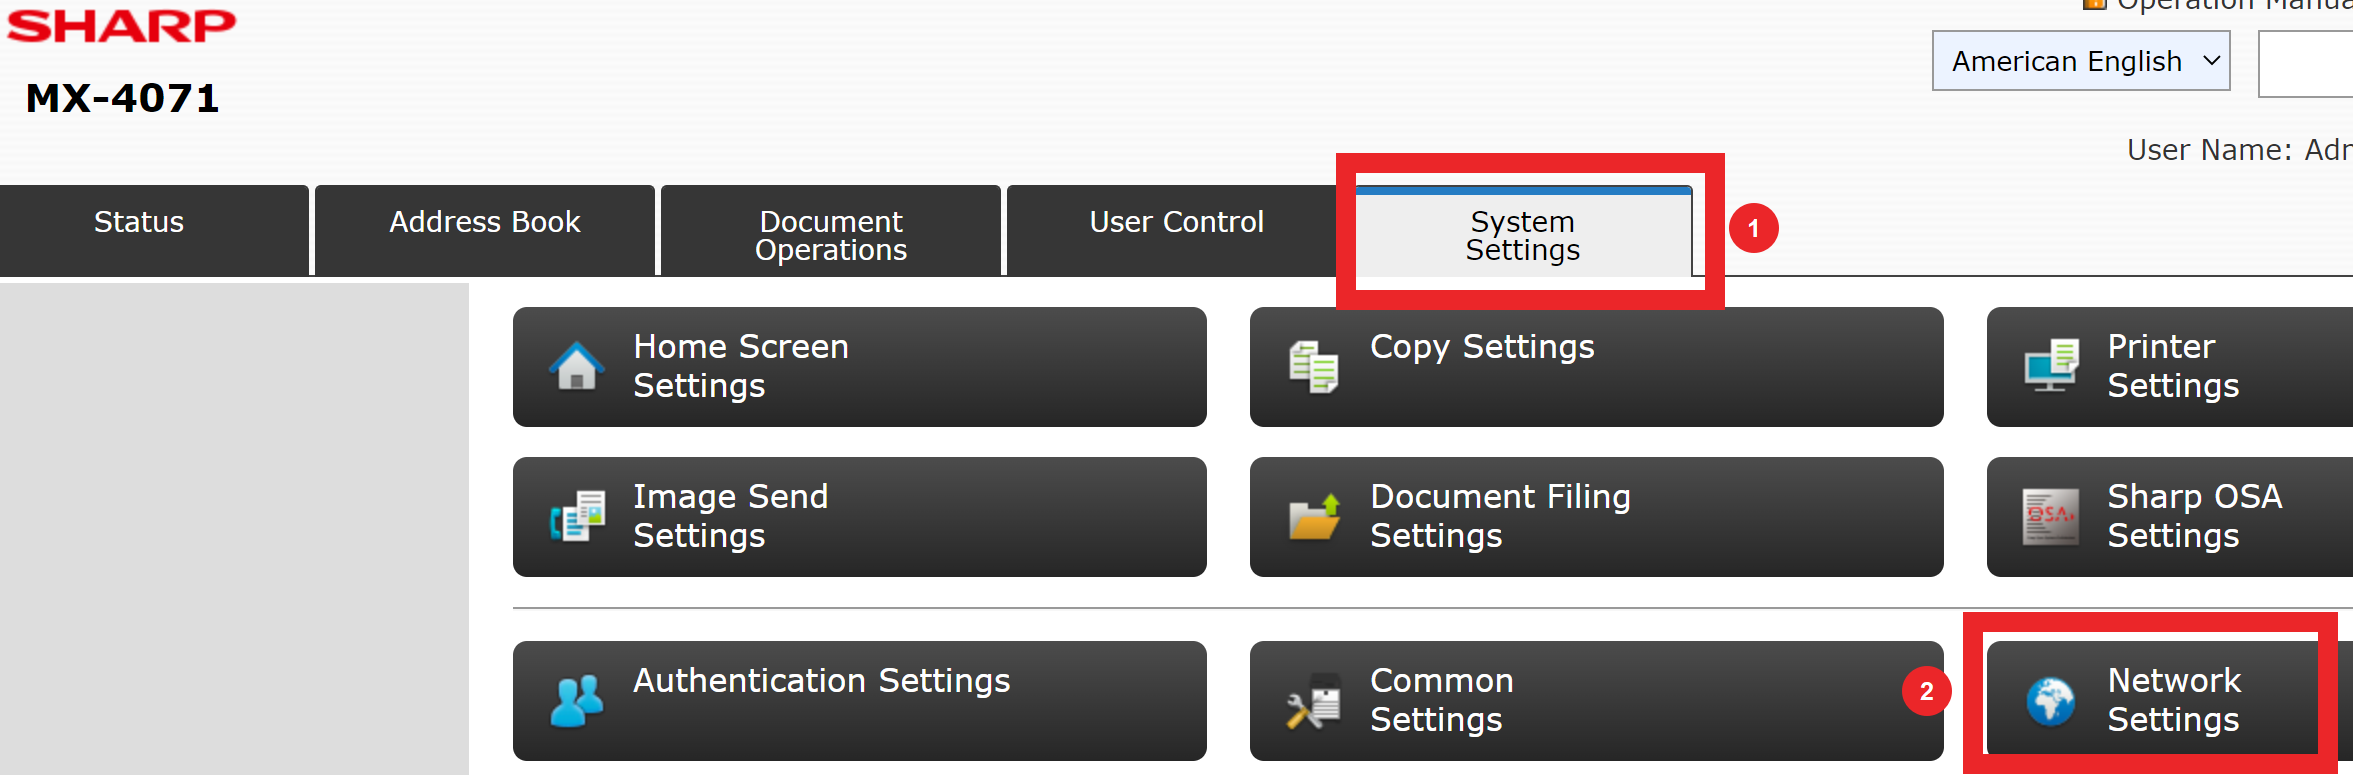
22. Click Services Settings on the left menu, then ensure you are on the SMTP tab. (Note: this is not always the front tab, please click the SMTP tab to proceed.)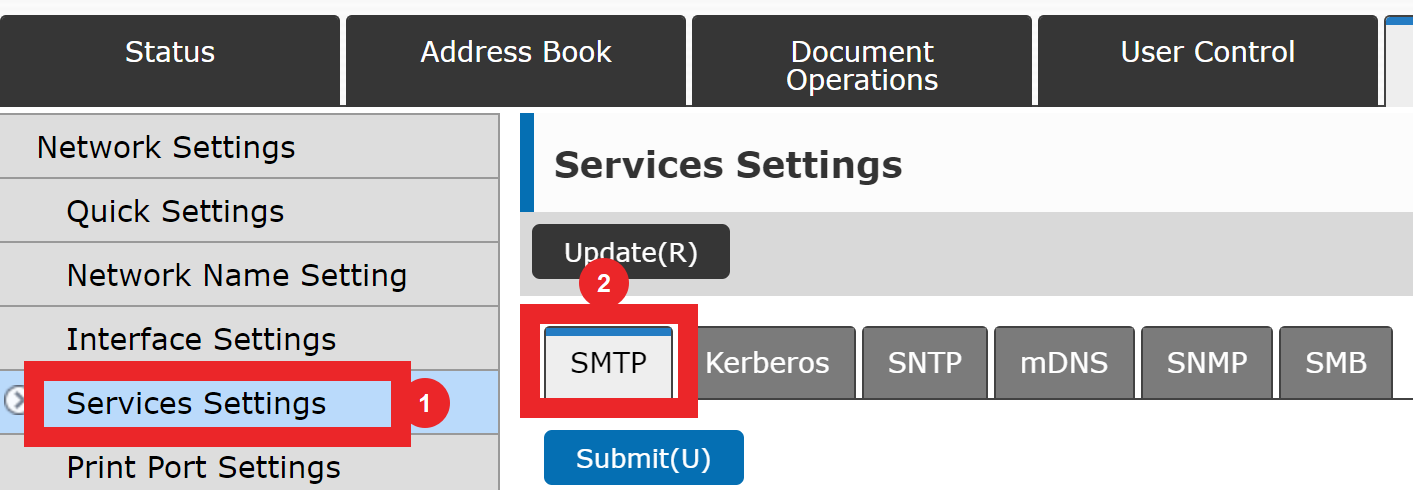
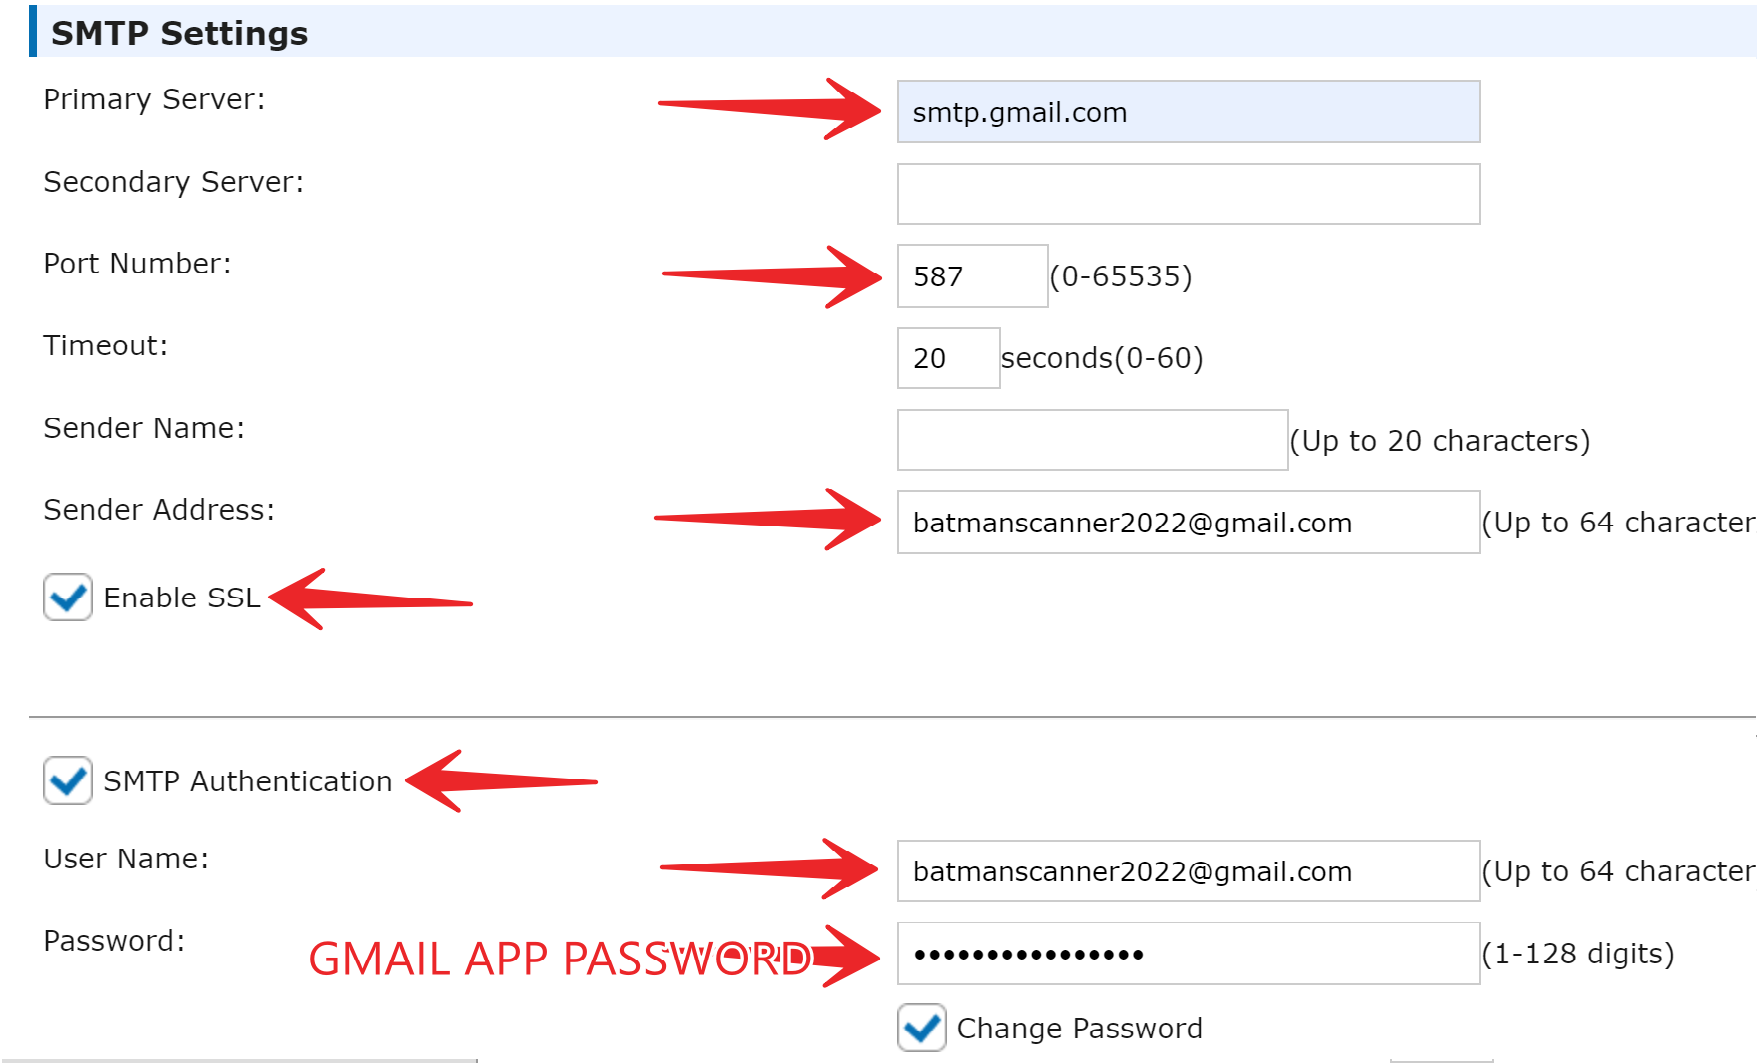
23. The SMTP Settings are as follows:
- SMTP Server: smtp.gmail.com
- Port Number: 587
- Sender Address: the email address you chose in step 5
- Enable SSL
- Enable SMTP Authentication
- Username: the email address you chose in step 5
- Password: paste the copied APP PASSWORD from the Gmail app password creation process
24. Click Submit, to save the settings, then scroll back down to the bottom of the page and click Execute to run the connection test. On the pop-up window, click OK. Verify that the connection test was successful. 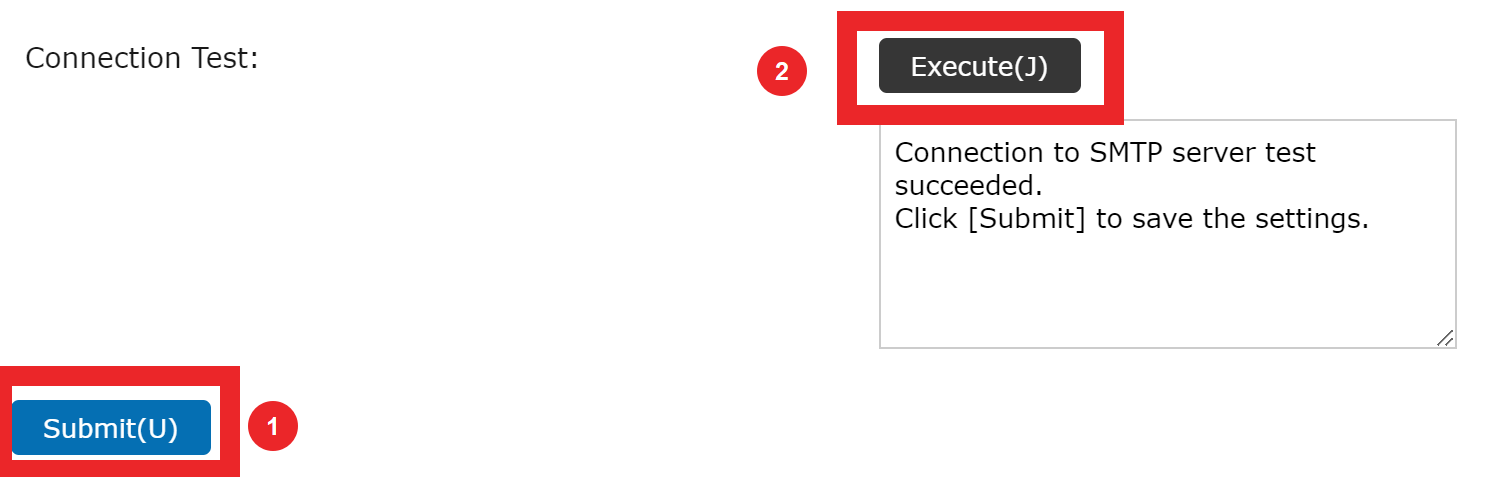
This concludes the process of setting up a Sharp device to Scan to Email via Gmail App Password using 2-factor Authentication. As of May 31, 2022 Gmail will disable the Less Secure Apps feature.
If you need further assistance, please contact Platinum Copier Solutions at (281) 645-4036.
Models these instructions pertain to: MX-3051, MX-2651, MX-3071, MX-3551, MX-3571, MX-4051, MX-4071, MX-5051, MX-5071, MX-5070, MX-5050, MX-3050, MX-3070, MX-3550, MX-3570, MX-6050, MX-6070, MX-6051, MX-6071, MX-M3050, MX-M3051, MX-M3070, MX-M3071, MX-M3550, MX-M3551, MX-M3570, MX-M3571, MX-M4050, MX-M4051, MX-M4070, MX-M4071, MX-2640N, MX-3140N, MX-3640N, MX-4140N, MX-4141N, MX-5140N, MX-5141N, BP-70C31, BP-70C36, BP-70C45, BP-50C26, BP-50C31, BP-50C36, BP-50C45, BP-70C55, BP-70C65, BP-50C55, BP-50C65, BP-50M26, BP-50M31, BP-50M36, BP-50M45, BP-50M55, BP-50M65, BP-70M31, BP-70M36, BP-70M45, BP-70M55, BP-70M65, MX-6580N, MX-7080N, MX-M905, MX-M1205, MX-M1206, MX-M1056, MX-M1055