How To: Scan to Sharp Copier Hard Drive and Retrieve from Windows and Mac Computers
The following how-to will show you how to setup and use your Sharp copier’s hard drive as a shared folder that you can scan to and grab documents from, whether you’re using Windows or Mac.
Reasons this is handy:
- It’s very simple to setup and manage
- Mac FTP sharing was removed from Mac OS, so this will allow you to scan to folders with a Mac, rather than email
- It requires no domain/network username and password
- SMB2 not required – no SMB vulnerabilities
Before you get started you’ll need your machine’s IP address.
- Touch Settings on the home screen, touch Status tab, touch Network Status on the left, then scroll down to find IPv4 Address.
- How to print your network configuration page
Video Instruction on How To Scan to Sharp Copier Hard Drive and Retrieve
Step By Step Instructions on How To Scan to Sharp Copier Hard Drive and Retrieve
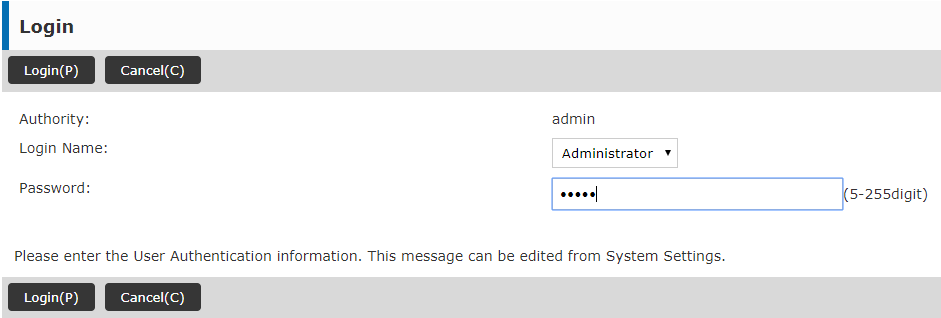
- Open the Sharp web page by typing the IP address into an address bar of your favorite web browser and click Login at the top-right corner

- Type the administrator password for your Sharp device into the password box. The password by default is “admin” then click login
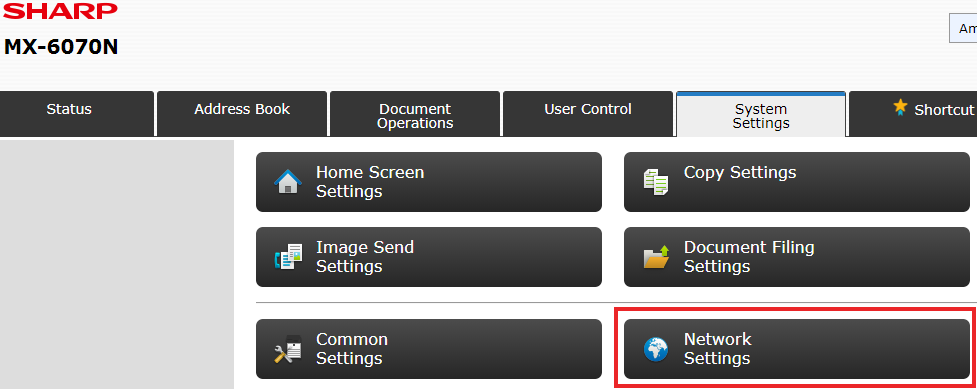
- Click System Settings Tab, then Click Network Settings
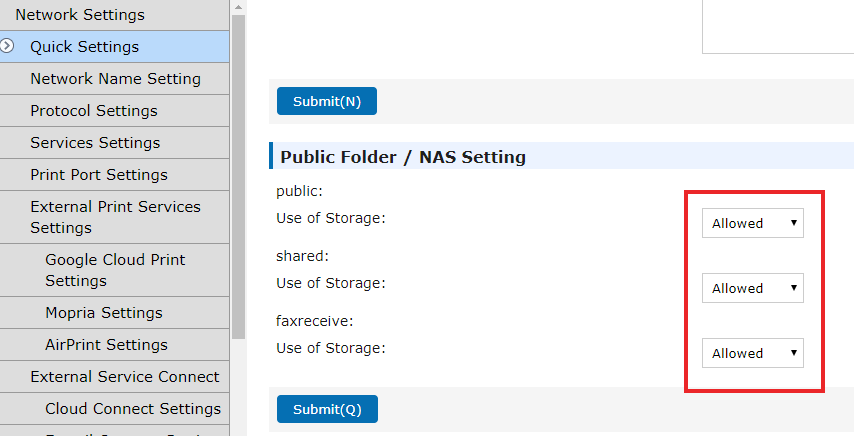
- Scroll to the bottom of the Quick Settings page and make sure the NAS is Enabled, if it’s not, change it to Enabled and click Submit.
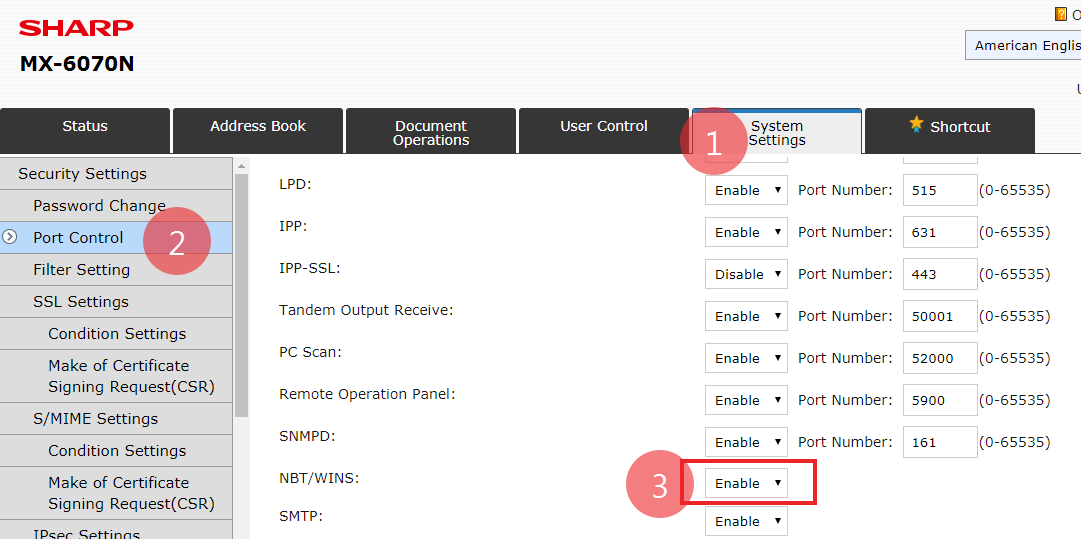
- Click System Settings tab, then click Security Settings

- Click Port Control on the left menu, then scroll down and enable NBT/WINS(on the newer models you will have SMB instead of NBT/WINS) and then click Submit. Click Reboot Now.
- At this point the copier will reboot – this takes about 30 seconds
- At this point the copier will reboot – this takes about 30 seconds
- Click the Address book tab on the web page and wait until the page loads to indicate the machine is back online.
-
MAC USERS – SKIP TO STEP 18 WITH THE RED FONT BELOW
-
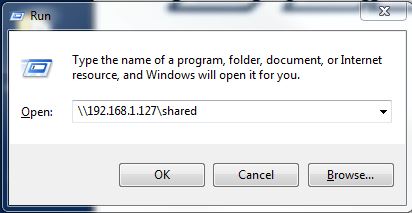
- Press Windows Key+R to open the run window, then type \\*MachineIPaddress*\Shared and click OK (put your machines IP in the path)
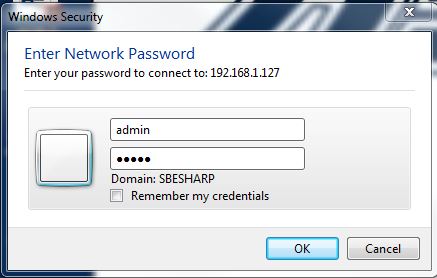
- Enter admin for both the username and the password when prompted
- When the window opens, create a folder called Scans.

- (Optional) Create sub-folders for individual users or departments
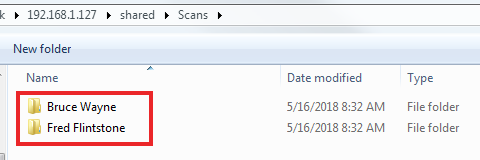
- Copy the path of the Scans folder (or the user’s folder if you made sub-folders) and make a shortcut to your desktop, or Map the folder in windows Explorer.

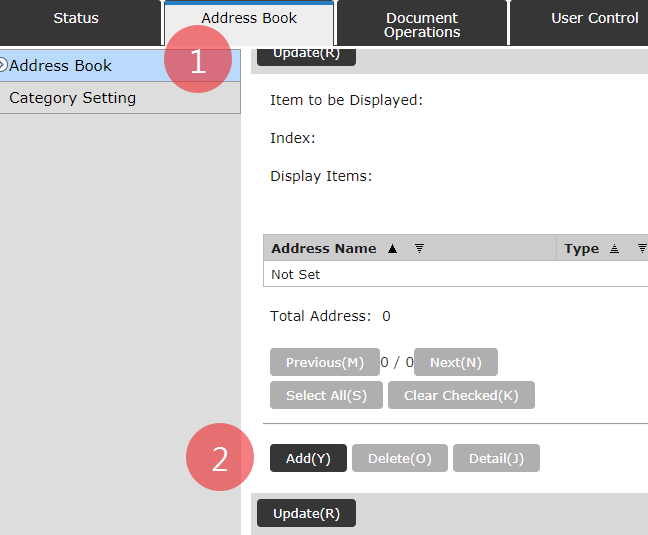
- Go back to the web page of the Sharp copier, click the Address Book tab, then click the Add button.
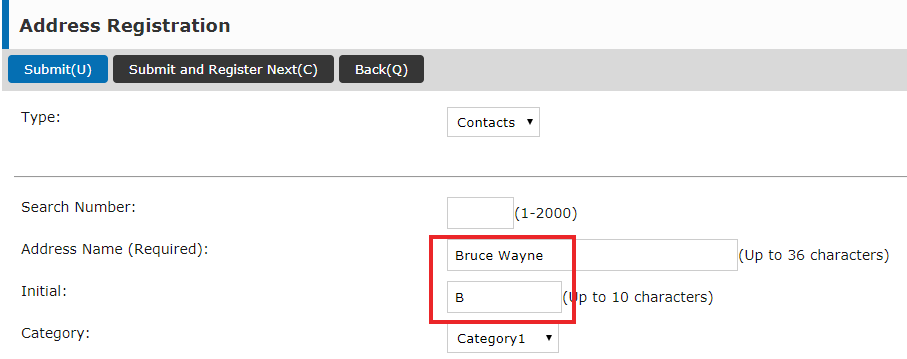
- Enter the user’s name(or whatever you’d like the button on the screen to read) and an initial.
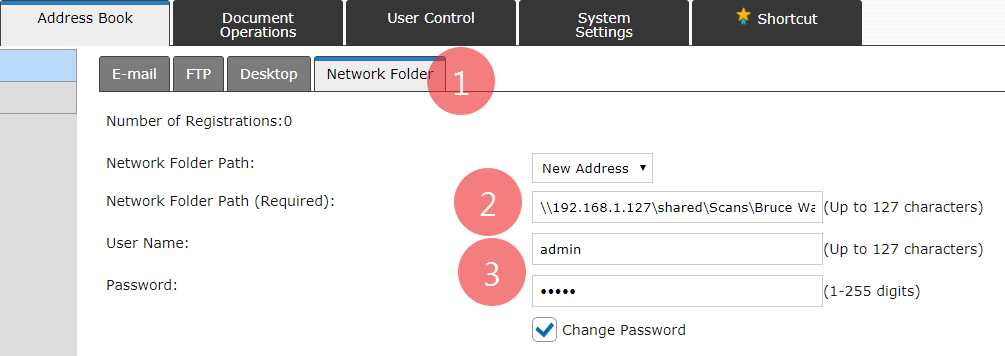
- Scroll down on this page, click the Network Folder tab, then paste the folder path you copied(for Mac users the path will be – \\*MachineIPAddress*\shared\scans\ ) into the Folder Path box. Enter admin for the username, check the Change Password box and enter admin for the password as well. Change any preferences regarding file format and then click Submit.
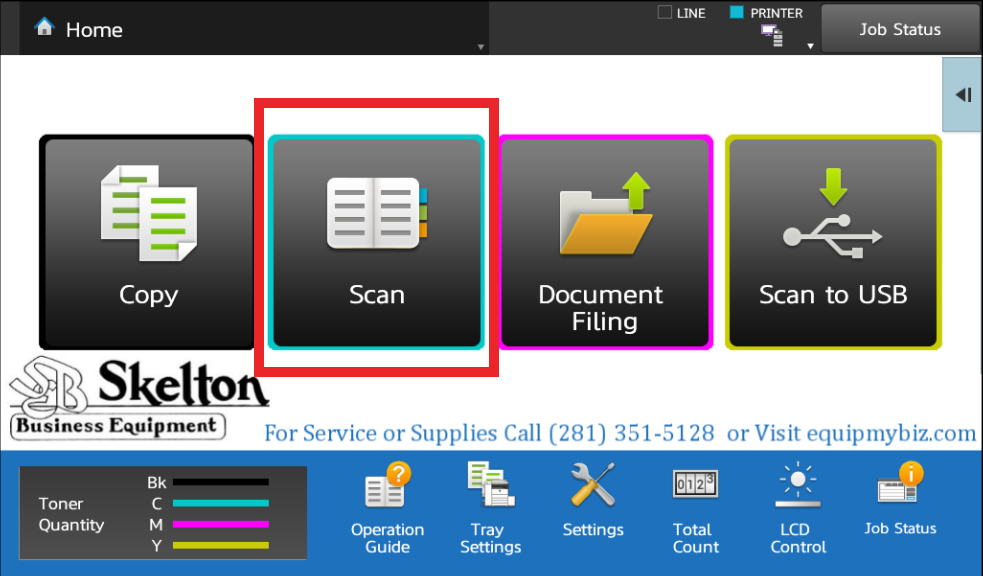
- The setup is finished, it’s time to test to make sure everything is working. At the copier’s touch screen touch Scan (or whichever button you have that opens Network Folder Scanning)
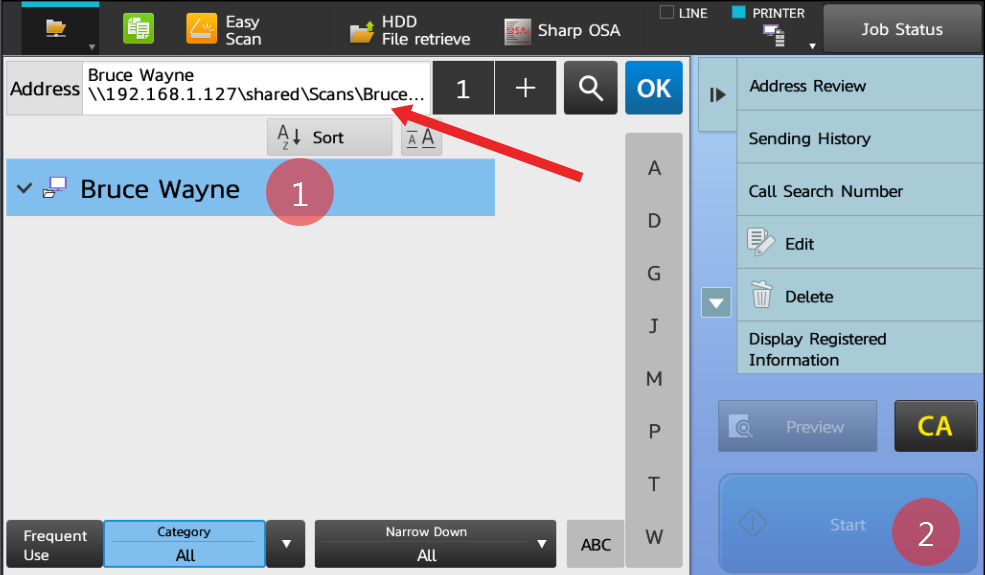
- Touch the name of the person’s folder you create(and you can see the path by the red arrow), then touch Start. After the paper is scanned check the folder on your computer to make sure the file landed inside.
- MAC USERS: Open Finder then click Go on the top toolbar and click Connect to Server.
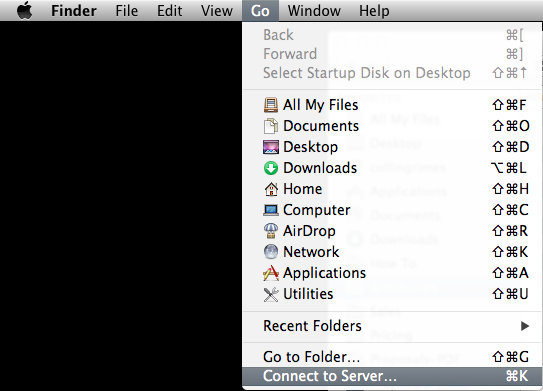
- Type the following into the Server Address box, then click Connect: smb://MachineIPAddress/shared
- Click the “+” to save this to your favorite servers
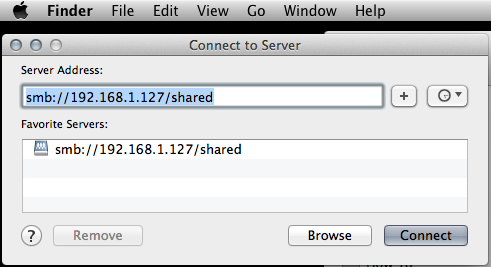
- Click the “+” to save this to your favorite servers
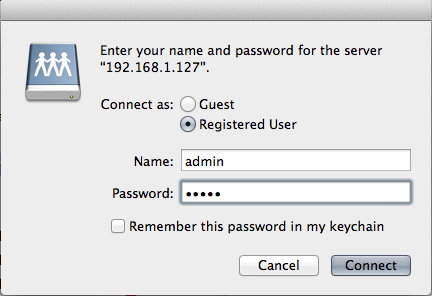
- Enter admin for both the username and the password, then click Connect. When the folder opens, create a new folder called Scans.
- This will mount a drive called Shared on your desktop. I recommend dragging and dropping into the folder structure within Finder to make it easier to find in the future.
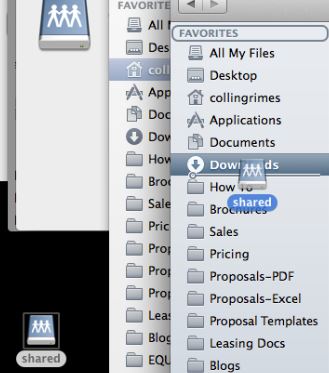
- You’re welcome to create sub-folders for individual users within this folder.
- Go back up to Step 13. Complete Steps 13-18.
Skelton Business Equipment is the premier Sharp dealer in Houston, TX. If you’re shopping for a new or used all-in-one copier printer scanner, we have your covered. We offer affordable purchase pricing and competitive leasing rates. Our all-encompassing copier service is second to none in Houston. We have a 4 hour-or-less service call turnaround time in all of the greater Houston area. Contact us for a quote on a new or refurbished copier today!

It is mainly contributing the scanning process from the hard drive and retrieve from Windows and Mac-based computer as well. Users may get trouble regarding such a scanning process. It will be fruitful for all the users.
Great instructions!! This worked for my MX-7580 but I cannot get it to work on my MX-4141n or a MX-2640N.
me also
Don’t forget to update the firmware on your Sharp MFP to the most current available version. There’s been lots of security changes to SMB and TLS, and your MFP may still have old OS’s blocking them from working with “Selected server not found” or “communication is lost while sending image” or other network errors. If you get CE-00, that’s a catchall error (usually it means unplugged or broken Cat 5e cable) and the server or destination is refusing the MFP.